Contact Us

Use the form on the right to contact us.

We offer extreme-performance custom flashlights, EDC, and accessories. Home of the world's most powerful production LED thrower with 3 kilometers ANSI throw. 

IMG_20180919_152657237EDITED.jpg

Blog

Keep up with the latest sales, discounts, news, product releases, and projects here on our blog. 

Airgun Moderator Design, Performance, and Development - Mass, Sound, and Aesthetics (part 21)

Silent Thunder Ordnance

IMG_20210327_113702005_HDRE.jpg

Catch the previous episode HERE.

Mass. It is the enemy of sound, being the most effective way to damp vibrations, but it is also the enemy of anything you’re going to carry. This is particularly the case with a moderator, where the last thing in the world you want is a big weight hanging off the end of the barrel. Since the beginning we’ve had a focus on lightness, our first experimental 1/2UNF moderator was even called Levitas. Our designs have gained some weight though, as they’ve adapted to higher production volume, modularity, higher power rifles, etc. They are still class leading when it comes to mass-to-sound ratio, being both exceptionally quiet and light.

IMG_20210327_085521136E.jpg

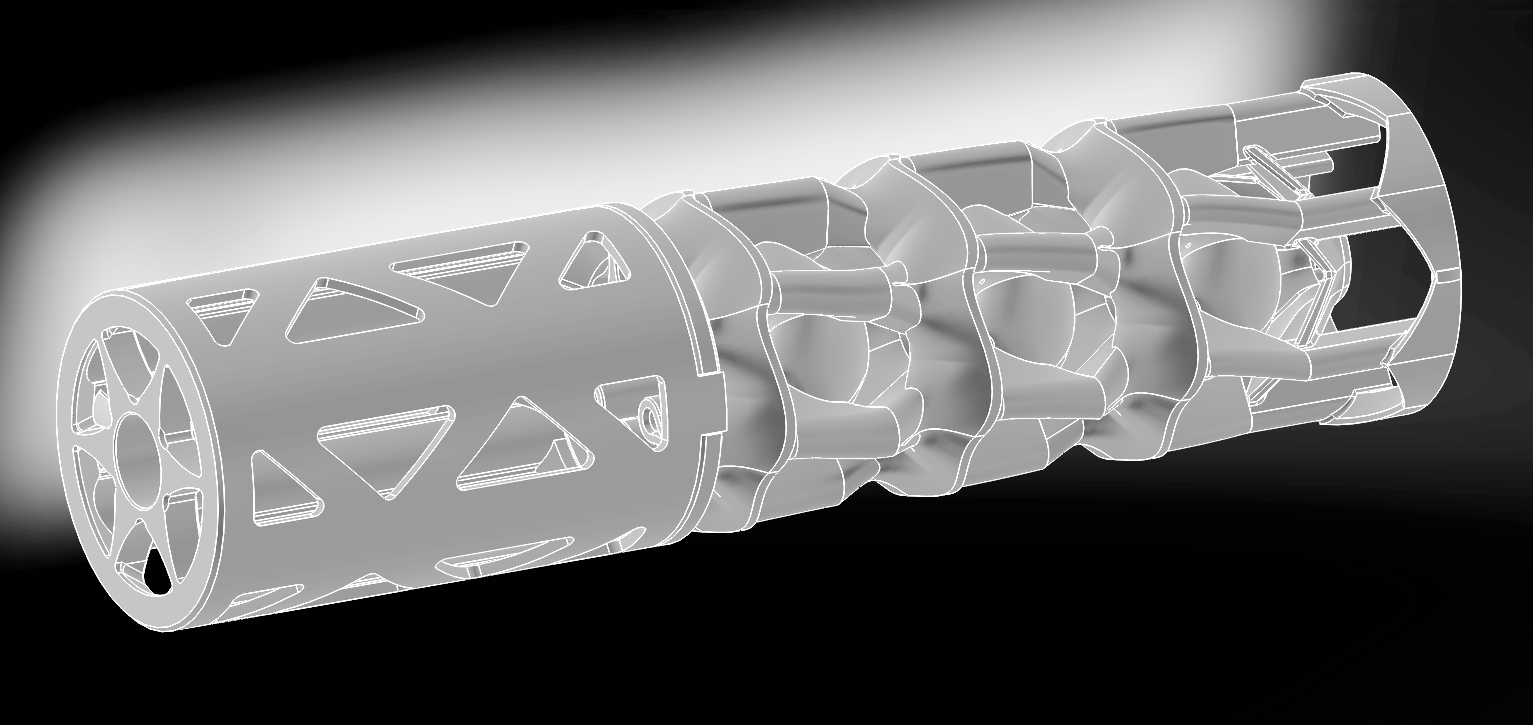
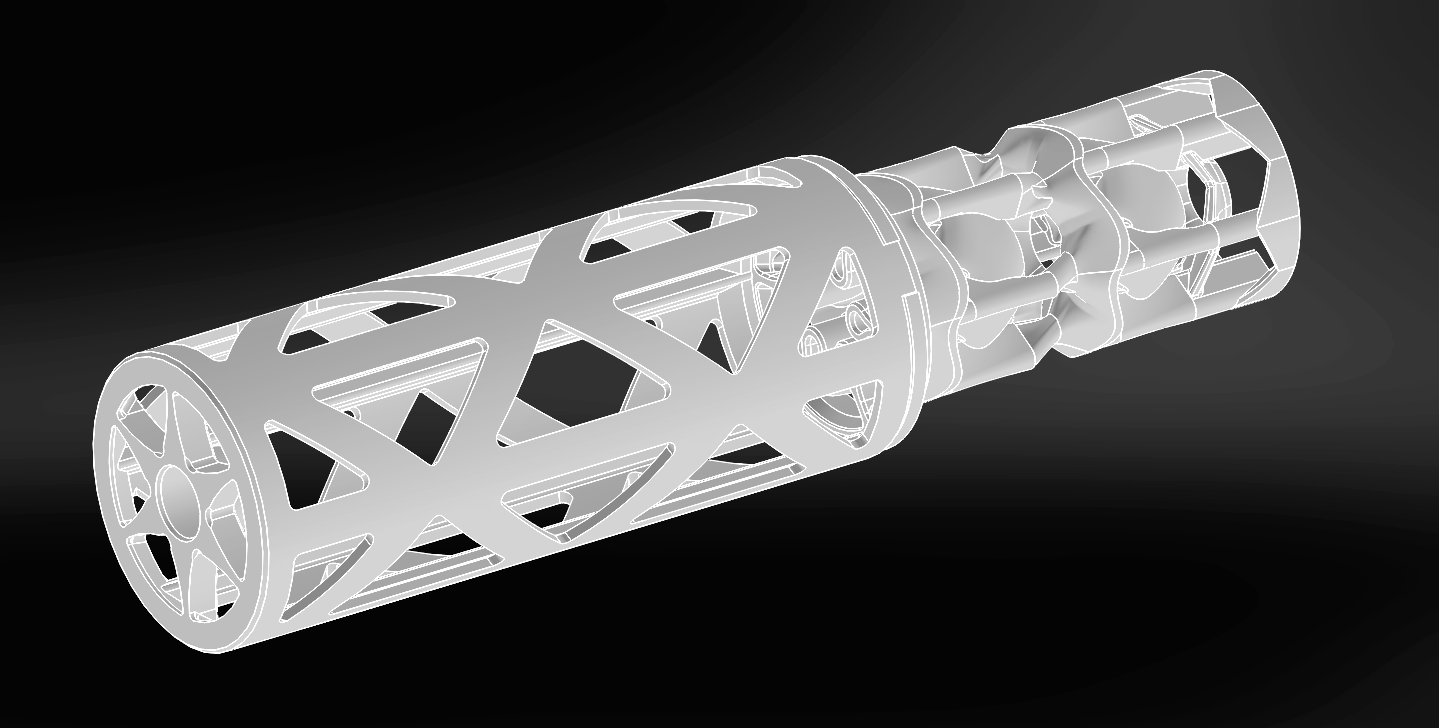
But there is always a desire for more. Enter the Accipiter line of moderators. The idea is to unchain these moderators from practical manufacturing costs and push them toward performance extremes. While they share the same dimensional envelopes as their base model Falx and Sarissa moderators, few parts are common. Everything has been tweaked to shave mass and maintain or gain performance. The result is, in the current configuration anyway, we’ve managed identical sound attenuation while cutting the mass by 1/3rd.

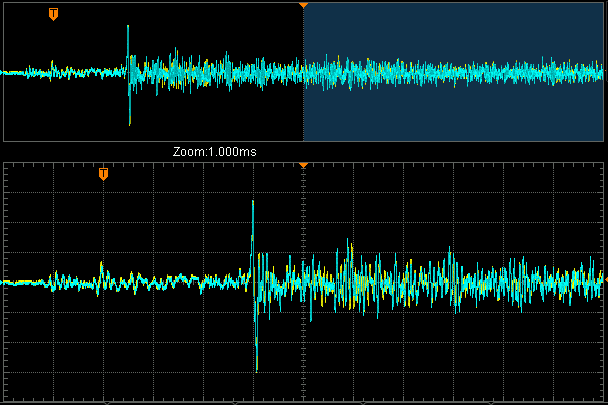
Sound. So we’ve been quietly beavering away, largely unsuccessfully, at making further significant improvements in sound attenuation. While a handful of little tweaks made it into the Accipiter line, allowing them to maintain performance parity with the standard line, so far none of the more advanced damping technologies have panned out. Acoustic metamaterials are a tough nut to crack. Interestingly though, even at standard flow, inferior damping materials can create substantial increases. One such example (pictured next to a production Falx’s trace for comparison, both captured on the same day minutes apart) managed to generate an average peak of 94. It is remarkable just how significant a role damping materials play. This is definitely an area for further development.

IMG_20210205_092929001_HDRE.jpg

Aesthetics. This is always a tricky one, beauty being in the eye of the beholder, however we’re pleased to offer engraving on a custom-order-basis. Shown above is just one example. We’ve found this is a great way to add visual flair without mass.

IMG_20210205_092911398_HDRE.jpg

Product Introduction - Accuracy 1st Scope Level Lume Insert

Silent Thunder Ordnance

DSC_6197E.JPG

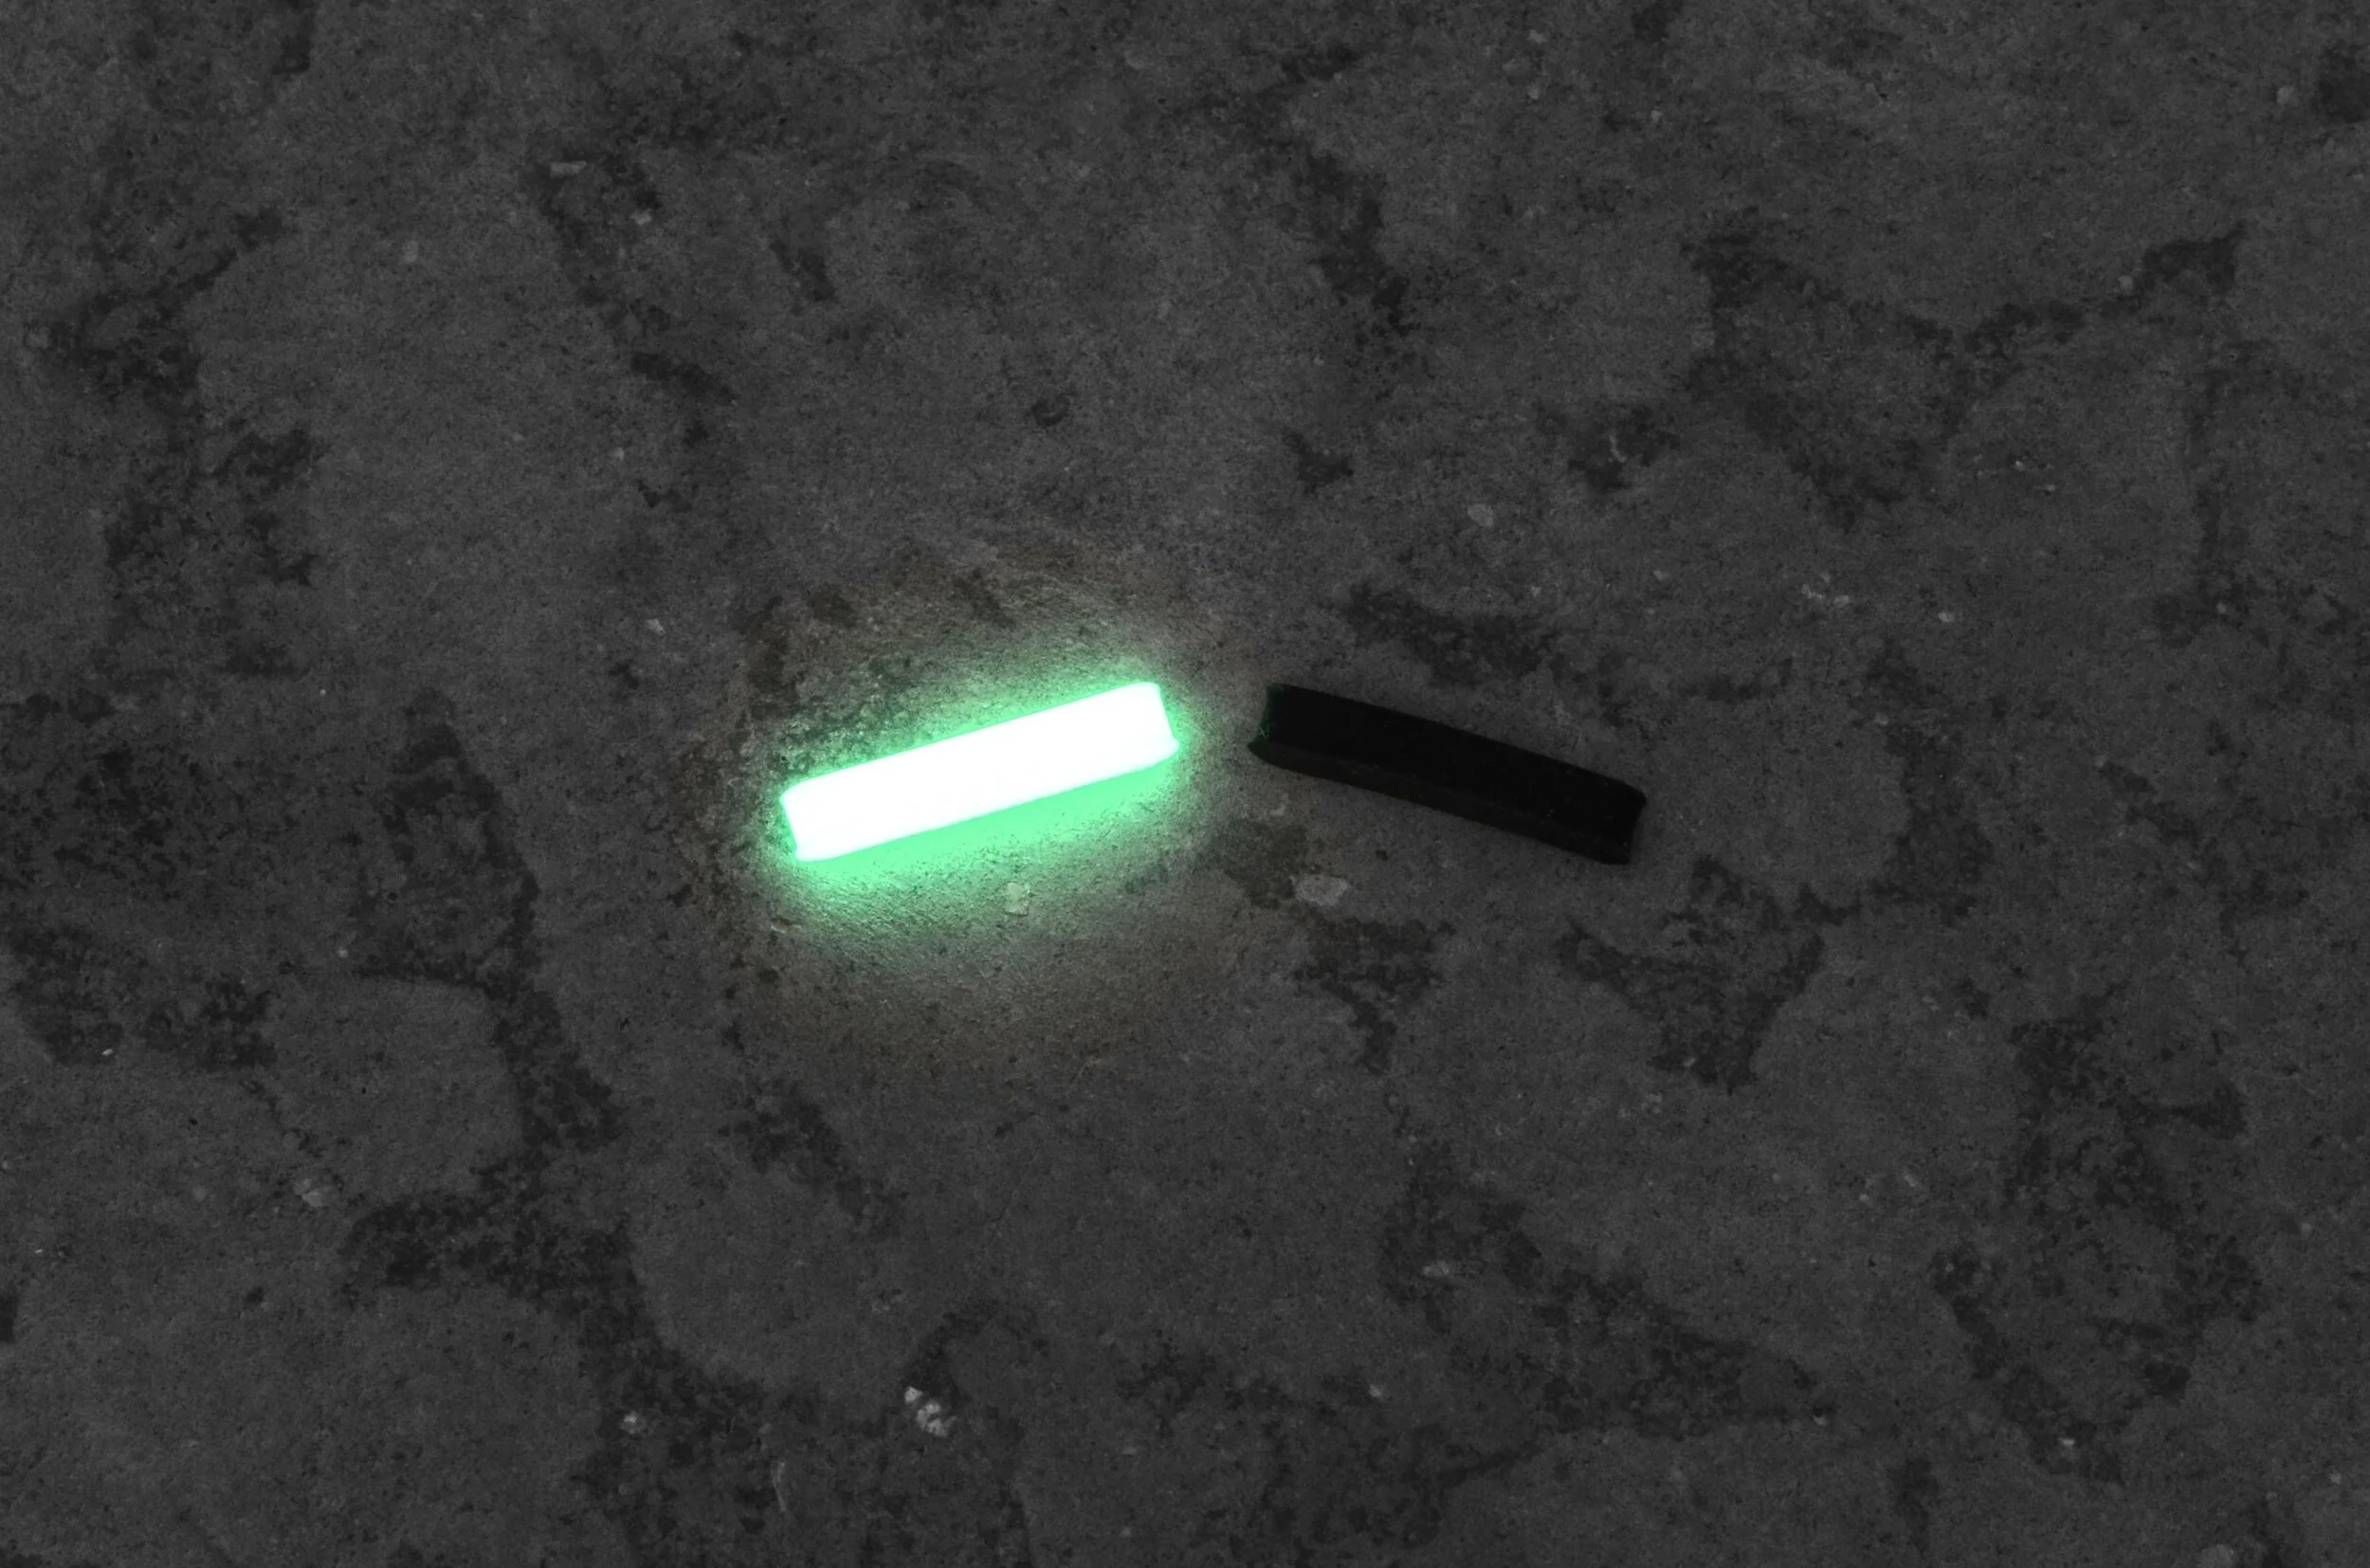
Lume Inserts for the Accuracy 1st Scope Levels. Another product added to our popular line of “glowy stuff.” Because the is the umpteenth glowy product we’ve rolled out, we’ll skim over the specifics about why/how our glow technology is some of the brightest and longest lasting available. You can learn more about colors and our glow tech here.

The short version though is we’ve made a higher performance glow insert which is a drop-in-upgrade for Accuracy 1st Scope Levels. Now you can maintain perfect precision, day or night.

What use is a scope level though, and why Accuracy 1st? Well Accuracy 1st makes one of the best scope levels on the market, their copy explains why pretty well. It has a number of advantages over bubble levels (it uses a ceramic ball) giving calibrated gradations of cant. And why use a level at all? Well, very briefly, your scope is a calibrated instrument used to compensate for factors such as drop, wind drift, and so forth. Figure a given shot is a 4 mil holdover. Tilt your rifle 90 degrees on its side though. Is that same mildot going to correspond to the point of impact? No way, not even close, you’ll be hitting 4 mils to the side and 4 low. Small amounts of cant in your rifle, while less dramatic, still cause significant shifts between POA and POI. (yes even 1 degree) You can read more about it here.

Alright, perfect, you have one but now you’re shooting in the dark. Accuracy 1st includes a slot, hypothetically to fit a trit, but for a number of reasons this may also be a sub-optimal solution. Trits are hard to get, they are delicate, the slot is an odd size (not compatible with a standard trit of similar dimension), trits go bad, etc. Accuracy 1st even acknowledges this, and sells a big disposable battery powered light which clamps to the back of the level. How about a more elegant solution though?

Enter our insert. Each lume insert is an oval, with the same profile as the factory unit. (pictured below is the OEM on the right, our insert on the left) Each is made of a temperature and solvent/lubricant resistant rubber, allowing simple press-fit installation, no adhesive or tools are required. A quick ten second charge under bright light (or sunlight) will leave it glowing for over 24 hours. No batteries, no radioisotopes, no fuss.

Because green is far and away the highest performance, we do currently only offer these in green. If you’d like to commission a run in a custom color however, feel free to reach out.

DSC_6200Ecropped.JPG

Project - Custom Cherry MX Keys

Silent Thunder Ordnance

Your tools are things you interact with daily. Better tools make for better, and more enjoyable work, which in turn makes for better results. Those of us who flog a keyboard for a living, sooner or later, tend to stumble across mechanical keyboards and quickly become hooked. Sure mechanical keys last longer, are more precise, etc. but ultimately those are just rationalizations. Really, being able to precisely control the force and feel of your keystroke is why we love them. Cherry MX switches are currently the most popular, and for good reason. Whether you love the keyboard equivalent of debilitating garlic breath with Cherry Blues, you’re a psychopath and demand Cherry Reds, or have no imagination so like Cherry Browns we don’t judge. (you freaks)

We all use them, but of course we all love customization too. Mod it, tweak it, pimp it, put a sticker on it, whatever. Someone just HAD to make custom keys, as if that were an original idea…… (no points for guessing which flavour switches he uses) They actually came out pretty cool, I think anyway. He did two models, both command row keys but one as an exact match for a “typical” mould (ducky if you’re asking, bottom row in the above picture), the other extra tall for a single stand-out escape key (top row in the picture).

DSC_6164cropped.JPG

Limited Runs - Glowy Stuff

Silent Thunder Ordnance

DSC_6133E.JPG

Just a little heads up about two cool sprint runs here.

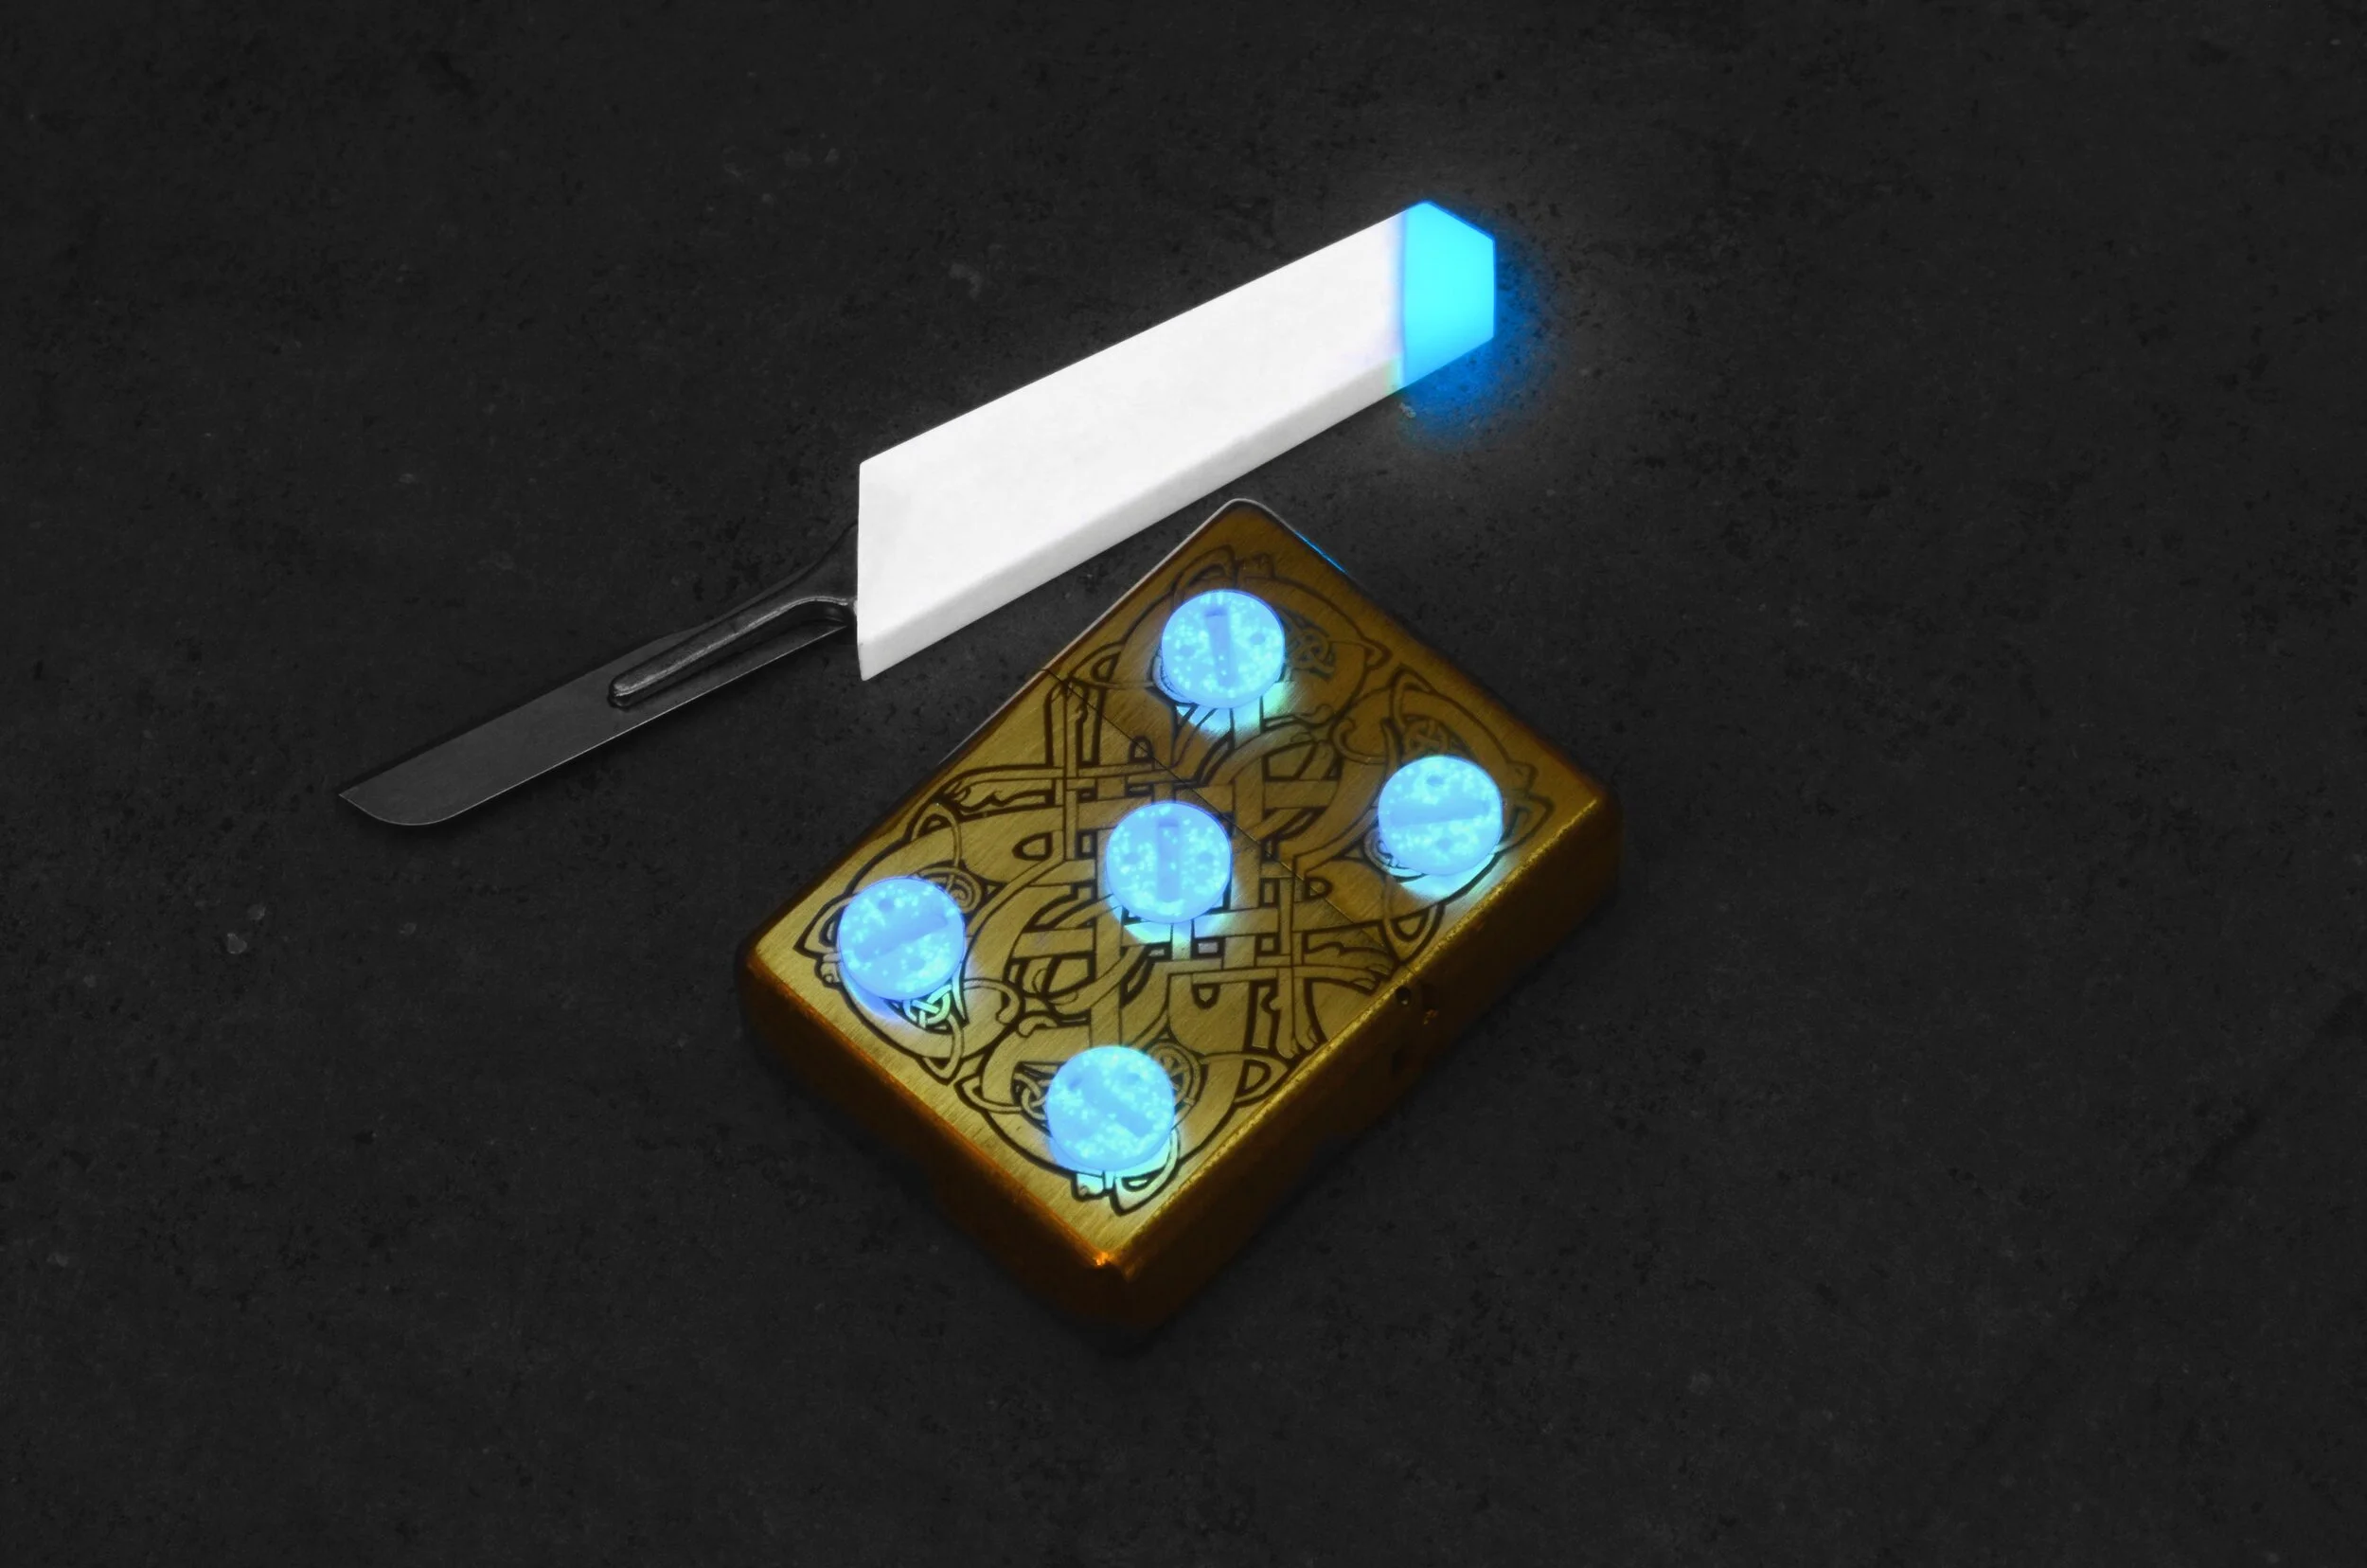
Above is our run of “night sky” autonomy fire buttons. They have background blue-purple glow with bright star-like pinpricks of light, like a bright starry night. Find them HERE.

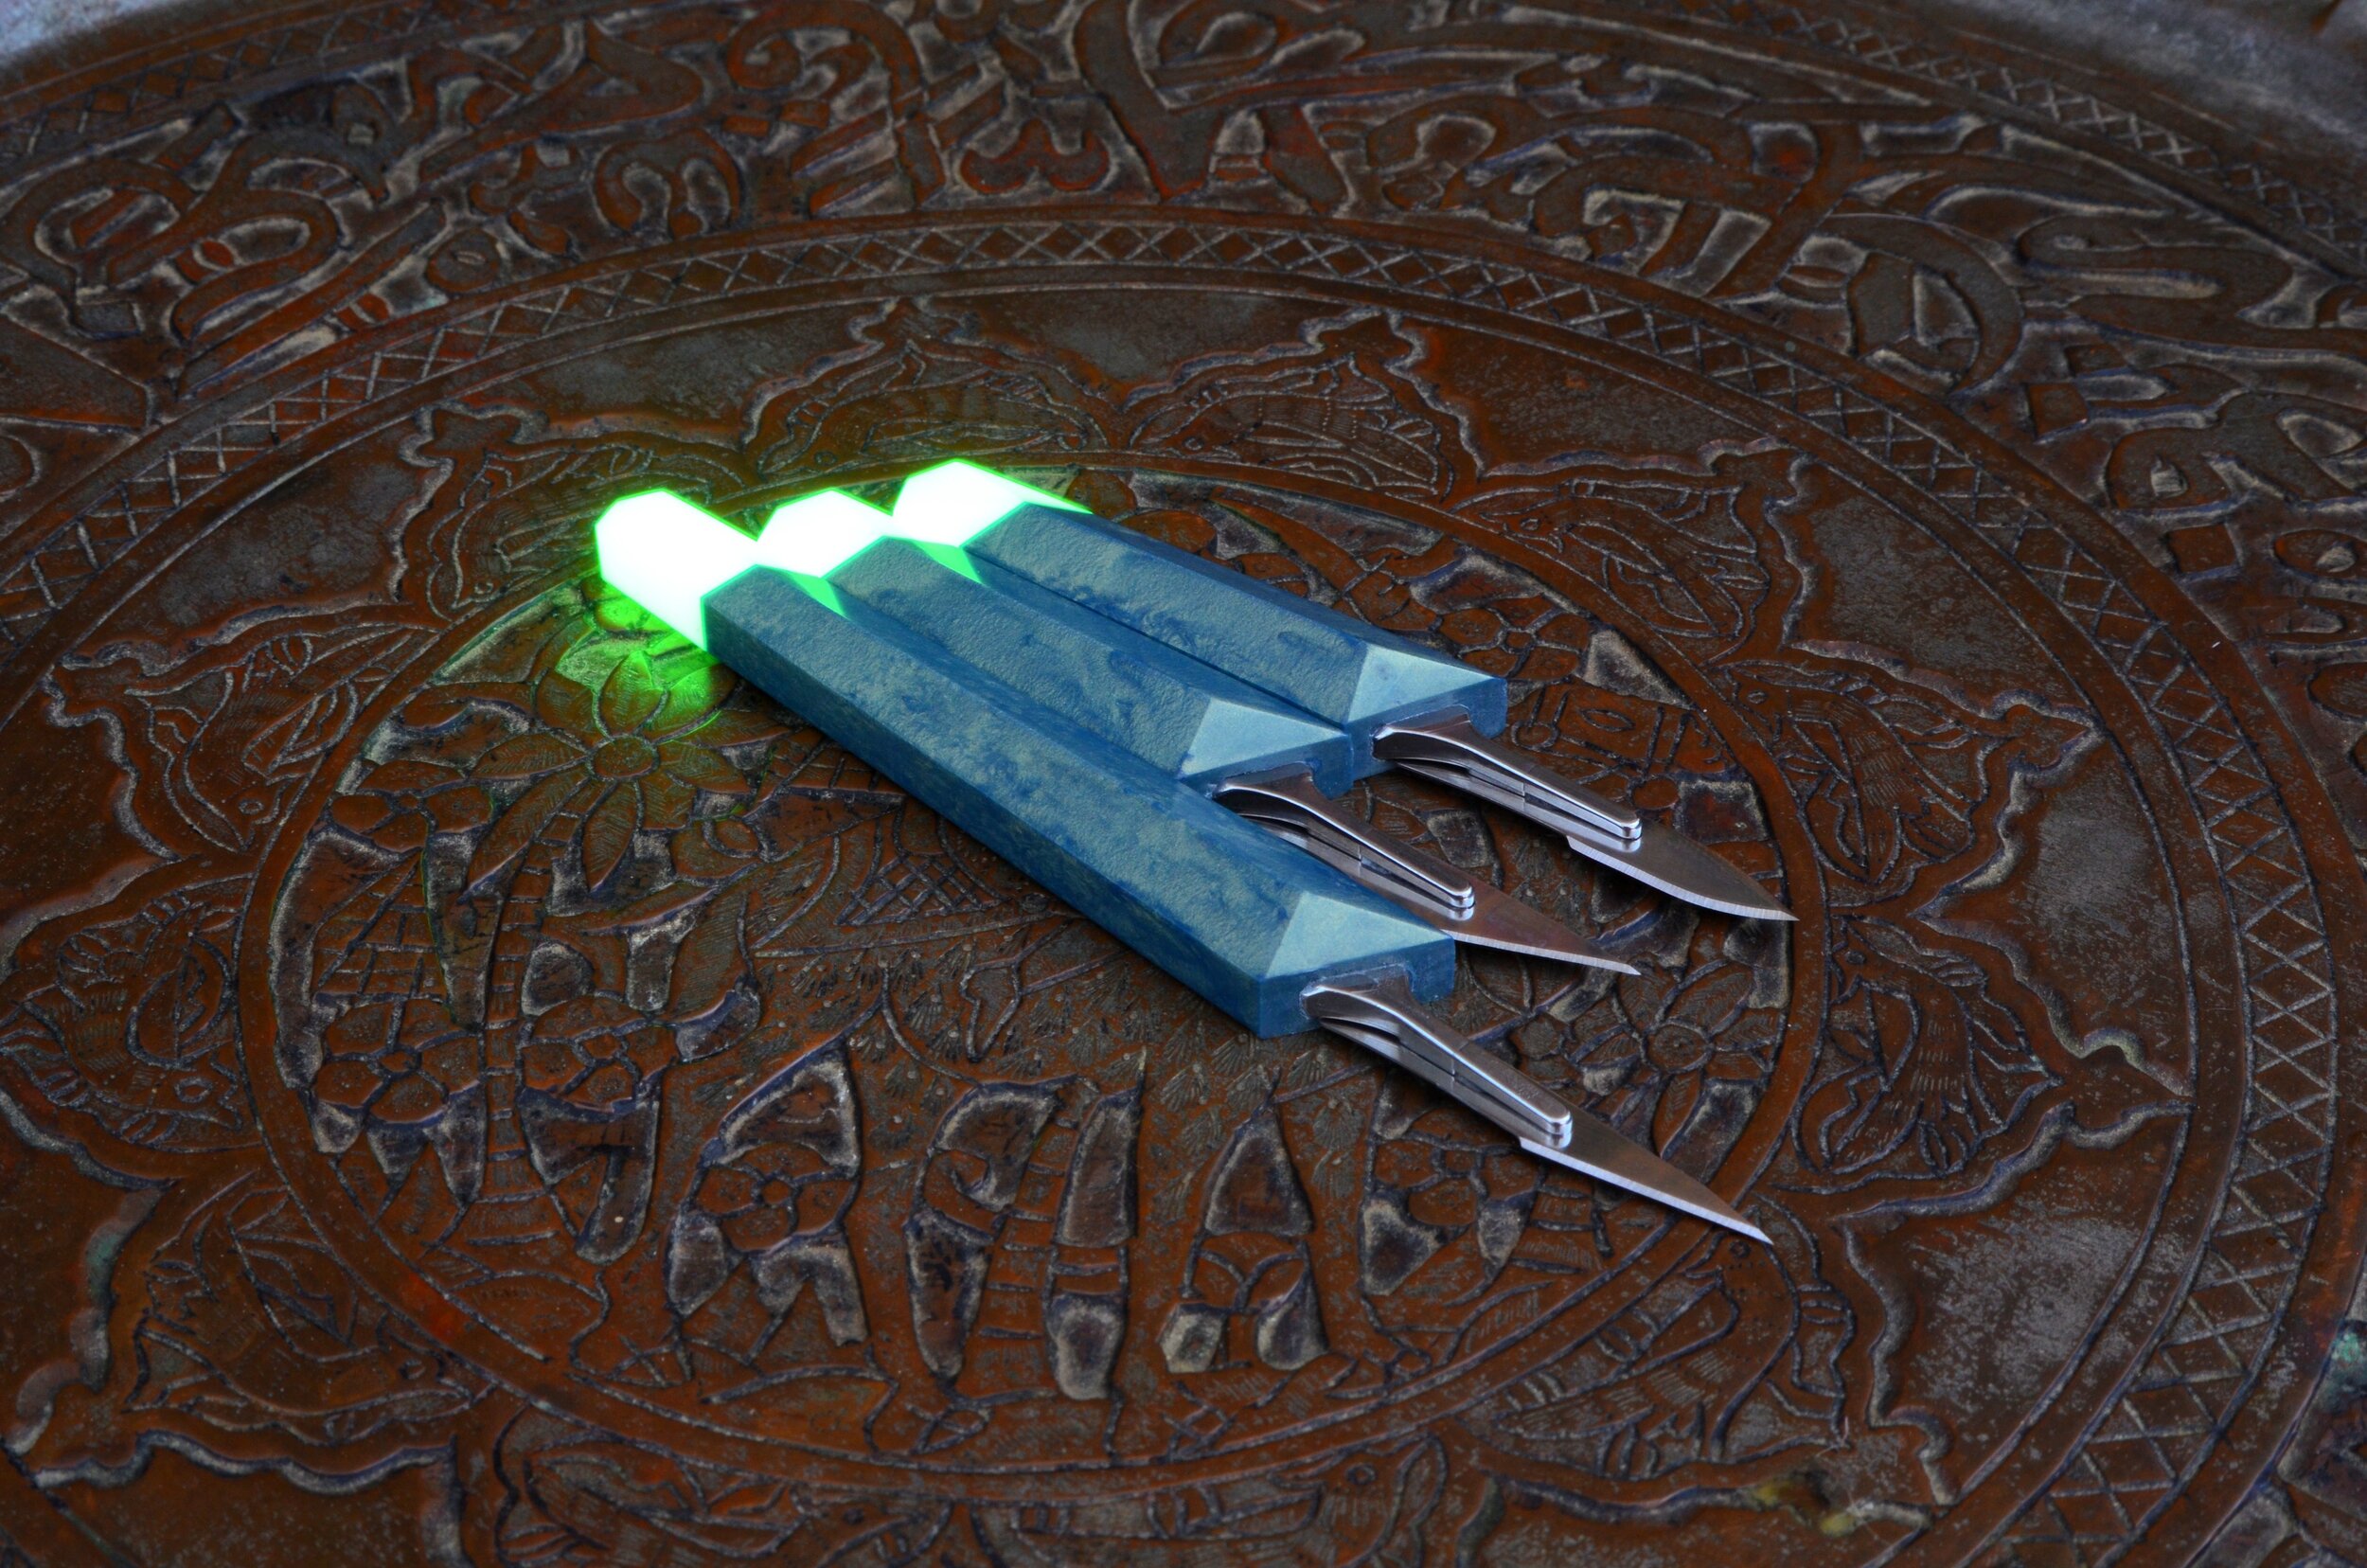
Below is a run of “firefly” dashi. Each has a scarab green handle, with a super bright green glowing thorax. Available in regular and fullthroat variants. Find them HERE.

DSC_6154E.JPG

Goodbye 2020

Silent Thunder Ordnance

IMG_20201230_105551185_HDRE.jpg

It has been one hell of a year. Of all the years I can remember, this is the one where it feels like we’re most in need of kicking back with a good drink, a cigar, and a nice target pistol to relax a bit. So I thought I’d round the year out with a blog post themed with this holy trinity (the good ATF, so good in fact the government needed to devote an entire agency just to stomping it down), and highlight a cool little commission we did.

This project was a bit of a lark. A customer came to us wanting slim non-metallic flask, but a little nicer than your typical cheap disposables. Something cool in which could carry his beverages, whatever they may be, without the issues of induced magnetic fields. Perhaps he likes to drink to calm his nerves while inside an MRI machine? Who am I to judge?

There are a couple plastic options, but somewhat by accident I stumbled across this very nice glass flask sold full of vanilla extract. We all thought the vintage style label was really cool, and better still it is made locally right here in Portland, Maine. So instead of removing the label, we clear-coated it, giving it better resistance to liquids and bonding it more permanently to the bottle. That alone not having quite enough zing, we engraved a filigree wolf’s head on the back. Silvering followed by our logo to the top of the cap rounds out the package.

And there it is. A nifty little project to round out a year when we all need (and probably deserve) a good strong drink. From all of us at STO we want to thank everyone for their patience and continued patronage. It has been a tough year between shipping disruptions, lockdowns, oh yeah and that pesky little “global pandemic” thing. Anyway, from all of us to all of you: thank you, and we wish all of you and your families health and safety in 2021!

Updates 12/2/20

Silent Thunder Ordnance

This is just a quickie. blog post with a few oddball updates, none of which would really merit a post on their own.

More TSDZ2 heatsinks are in production. We’ll get those done as quickly as possible. If you’d like to be added to a waitlist, please just message us using the icon in the top right hand corner and we’ll email you when more are available. We’ve been overwhelmed by the response, so thank you!

If you’re one of the 5-10 people in the world who want to see the borescope of a barrel, we’ve got a new one up, the .30 cal FX Dreamline. This rifle was purchased as new-inventory back in August, which is during the time period when FX was saying all their rifles come with the new Smooth Twist Superior liners, however there is no indication on the rifle, label, packaging, or vendor’s product listing to indicate one way or another. So who knows? I believe FX is now supposed to be marking these things with a sticker, at least aftermarket barrels, but you’d think lasering an ID tag on the side would be valuable as much for batch control as consumer sanity. *shrug* Either way, for what it is worth, above is a borescope of the rifle. The rifle has seen approximately 1,000 rounds, all of them JSB 50.15g pellets, most of them going at 880fps.

If you happen to have a North American Arms revolver (which are great little pistols by the way, would recommend) you’ve probably noticed that speed-reloads present a bit of a “challenge.” You don’t so much affect a fast exchange of empty cartridges for fresh ones as engage in a field stripping exercise in many cases. The Ranger II remedies the gun-half of this, and Desert Gun Leather has a nice speed loader to remedy the other half. Fantastic, but difficulty arises in carrying said speed loader, as it is only really useful if it can be reliably carried and quick-to-hand. So we cooked up a little design that the speed loader firmly clips into, protecting the cartridges, but can quickly and easily be withdrawn from. The design fits to a belt or waistband with either a loop or j-hook (pictured) We’ve got the design files available, free to anyone who need them.

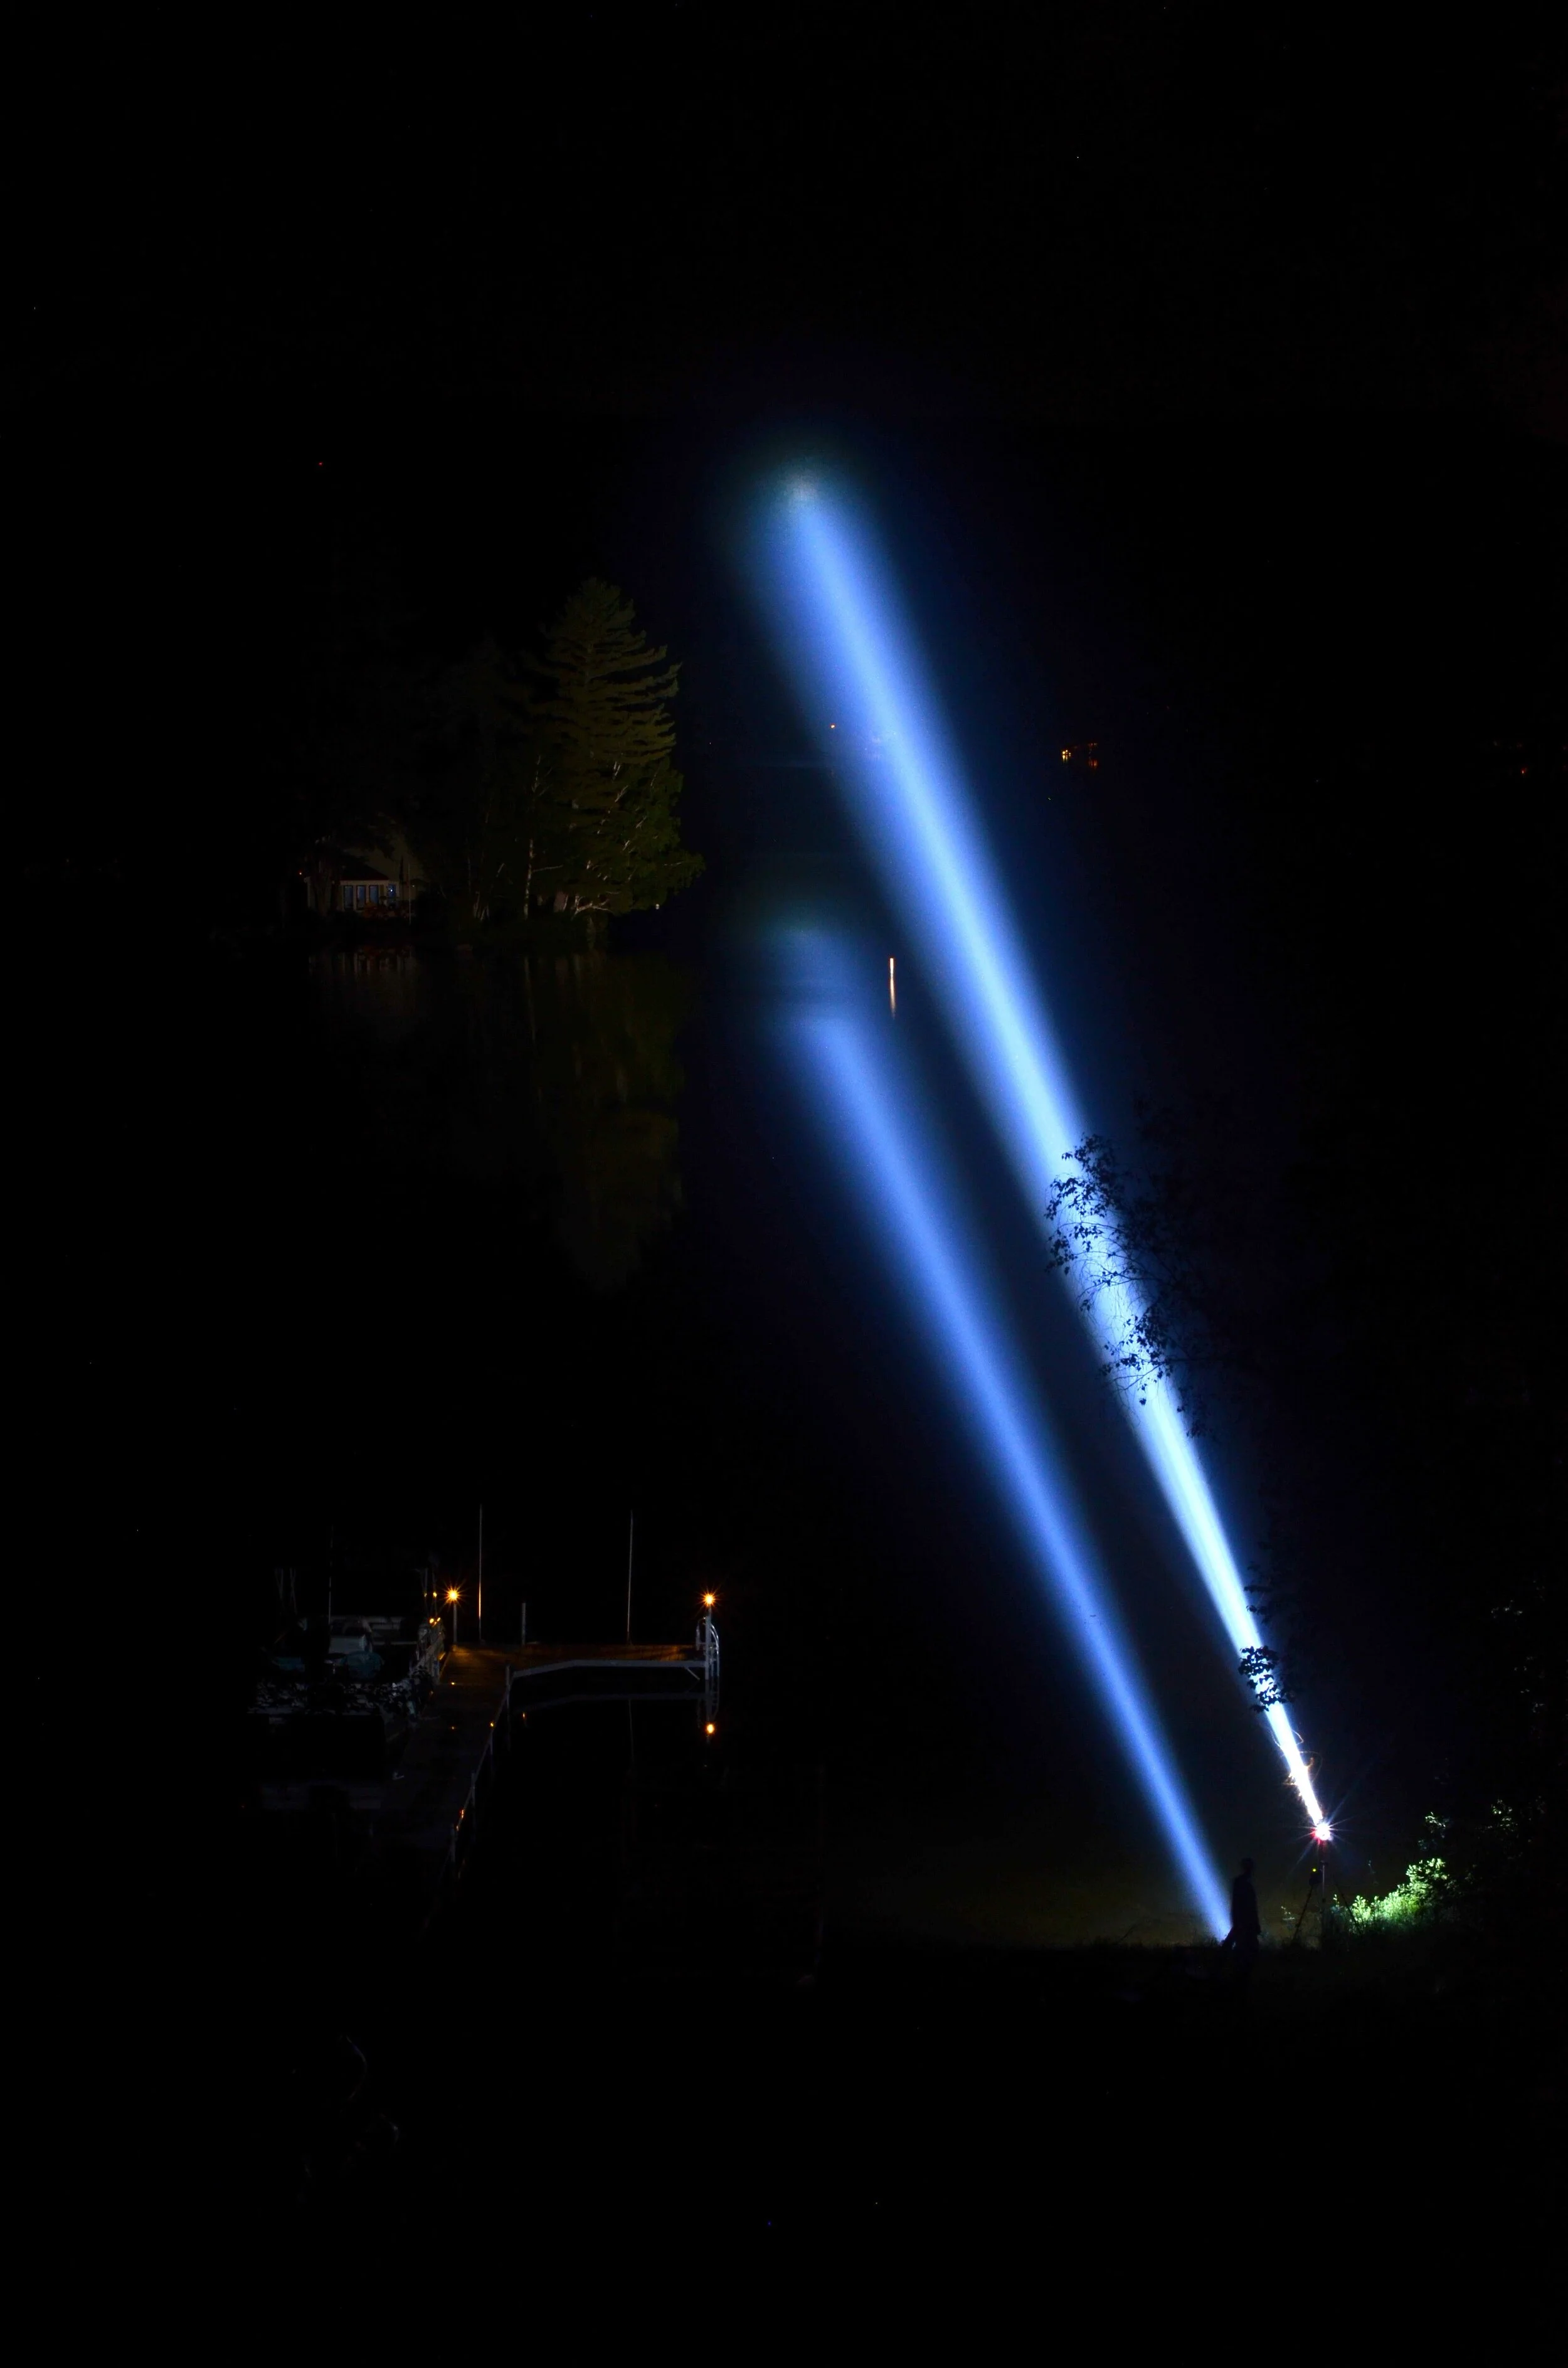
And, finally, it appears a few commercial flashlights are in the neighborhood of the Lance of Ra’s performance. With the LoX project shelved, and customers banging on our door asking for a new megathrower, it seemed only right we’d come up with some sort of answer…..

DSC_5446E.JPG

Project - Mountain Bike Stuff

Silent Thunder Ordnance

IMG_20201015_110756.jpg

It’s probably pretty clear by now that this blog and STO as a whole can sometimes be an excuse to develop stuff for our hobbies and figure out if it’s a viable product later. And this is no exception. Recently I’ve gotten a bit more interested in mountain biking and seeing that I can’t leave anything well enough alone, into custom building electric mountain bikes. After looking around at all the options for motor kits (starting with a kit in a vague hope to not let this turn into a endless project) I settled on the TSDZ2 motor due to it’s compact size and torque sensing feature. But you know I couldn’t leave that well alone either so then went in flashing the open source firmware, running it at the max voltage of 52V with a custom built battery pack, making a custom torque arm, replacing all the bike’s drivetrain to match up nicely, modifying the frame for perfect chainline, installing a temperature sensor, and finally improving the thermal performance of the unit. Many of these you can lookup or easily figure out how to do so I’m just going to cover the more specialized upgrades.

As many a DIY ebike enthusiast has quickly realized fitment on bikes other than the most basic of hardtails can be tricky and in the case of the torque arm fitting my bike’s rear suspension setup that was the case. To keep the motor from rotating around under torque you need to secure it to the frame rotationally which is normally done with a little piece that clamps to the chainstays that would be present on a hardtail. Easy enough I’ll just make a bracket that wraps around the seat tube and locks to the motor using the original mounting bolt. Considering the amount of torque this needs to withstand one would think that it needs to be made of metal. But 1000s of hours of 3D printing experience and a fascination with advanced material composites says otherwise. I whipped up a quick design to be printed from carbon fiber reinforced nylon and included wrapping guides for additional fiber reinforcement. With a little epoxy and some 100lb test kevlar braid it’s easy enough to add a theoretical 4000lbs of extra tensile strength to the part. Kevlar was used instead of UHMWPE or Carbon fiber because it’s easier to work with than carbon fiber and glues better than UHMWPE which has a terribly low surface energy.

IMG_8792.JPG

Next quick modification was grinding down about 6mm of the bottom bracket to get the motor far enough over for a perfect chainline. This was done, very carefully and precisely with an angle grinder and flapwheel. All kidding aside if you are very gentle, use wax to prevent the wheel from getting clogged up do to the affinity of aluminum to the aluminum oxide abrasive and take lots of measurements the final result was well under 0.5mm of parallelism with the factory side. A side bonus of this is the Q-factor is now just about perfect down the centerline with the help of an straight right side crank.

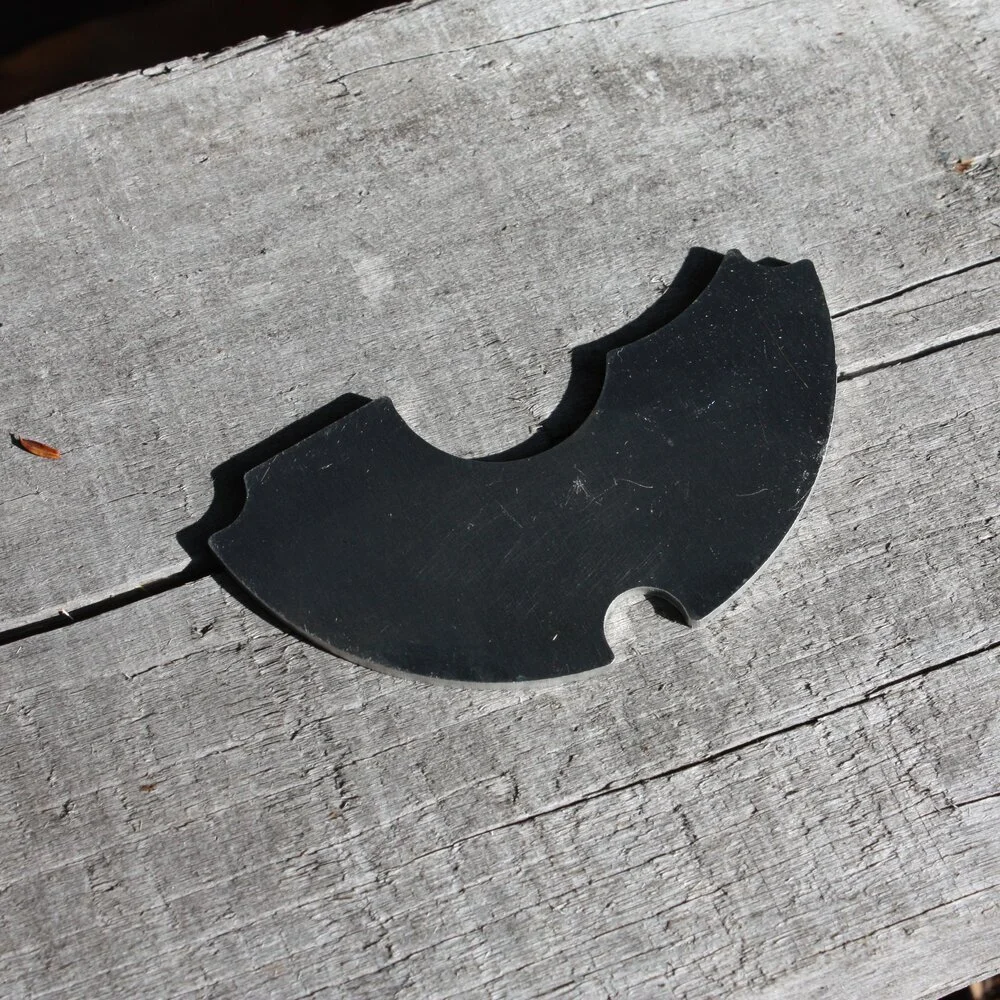
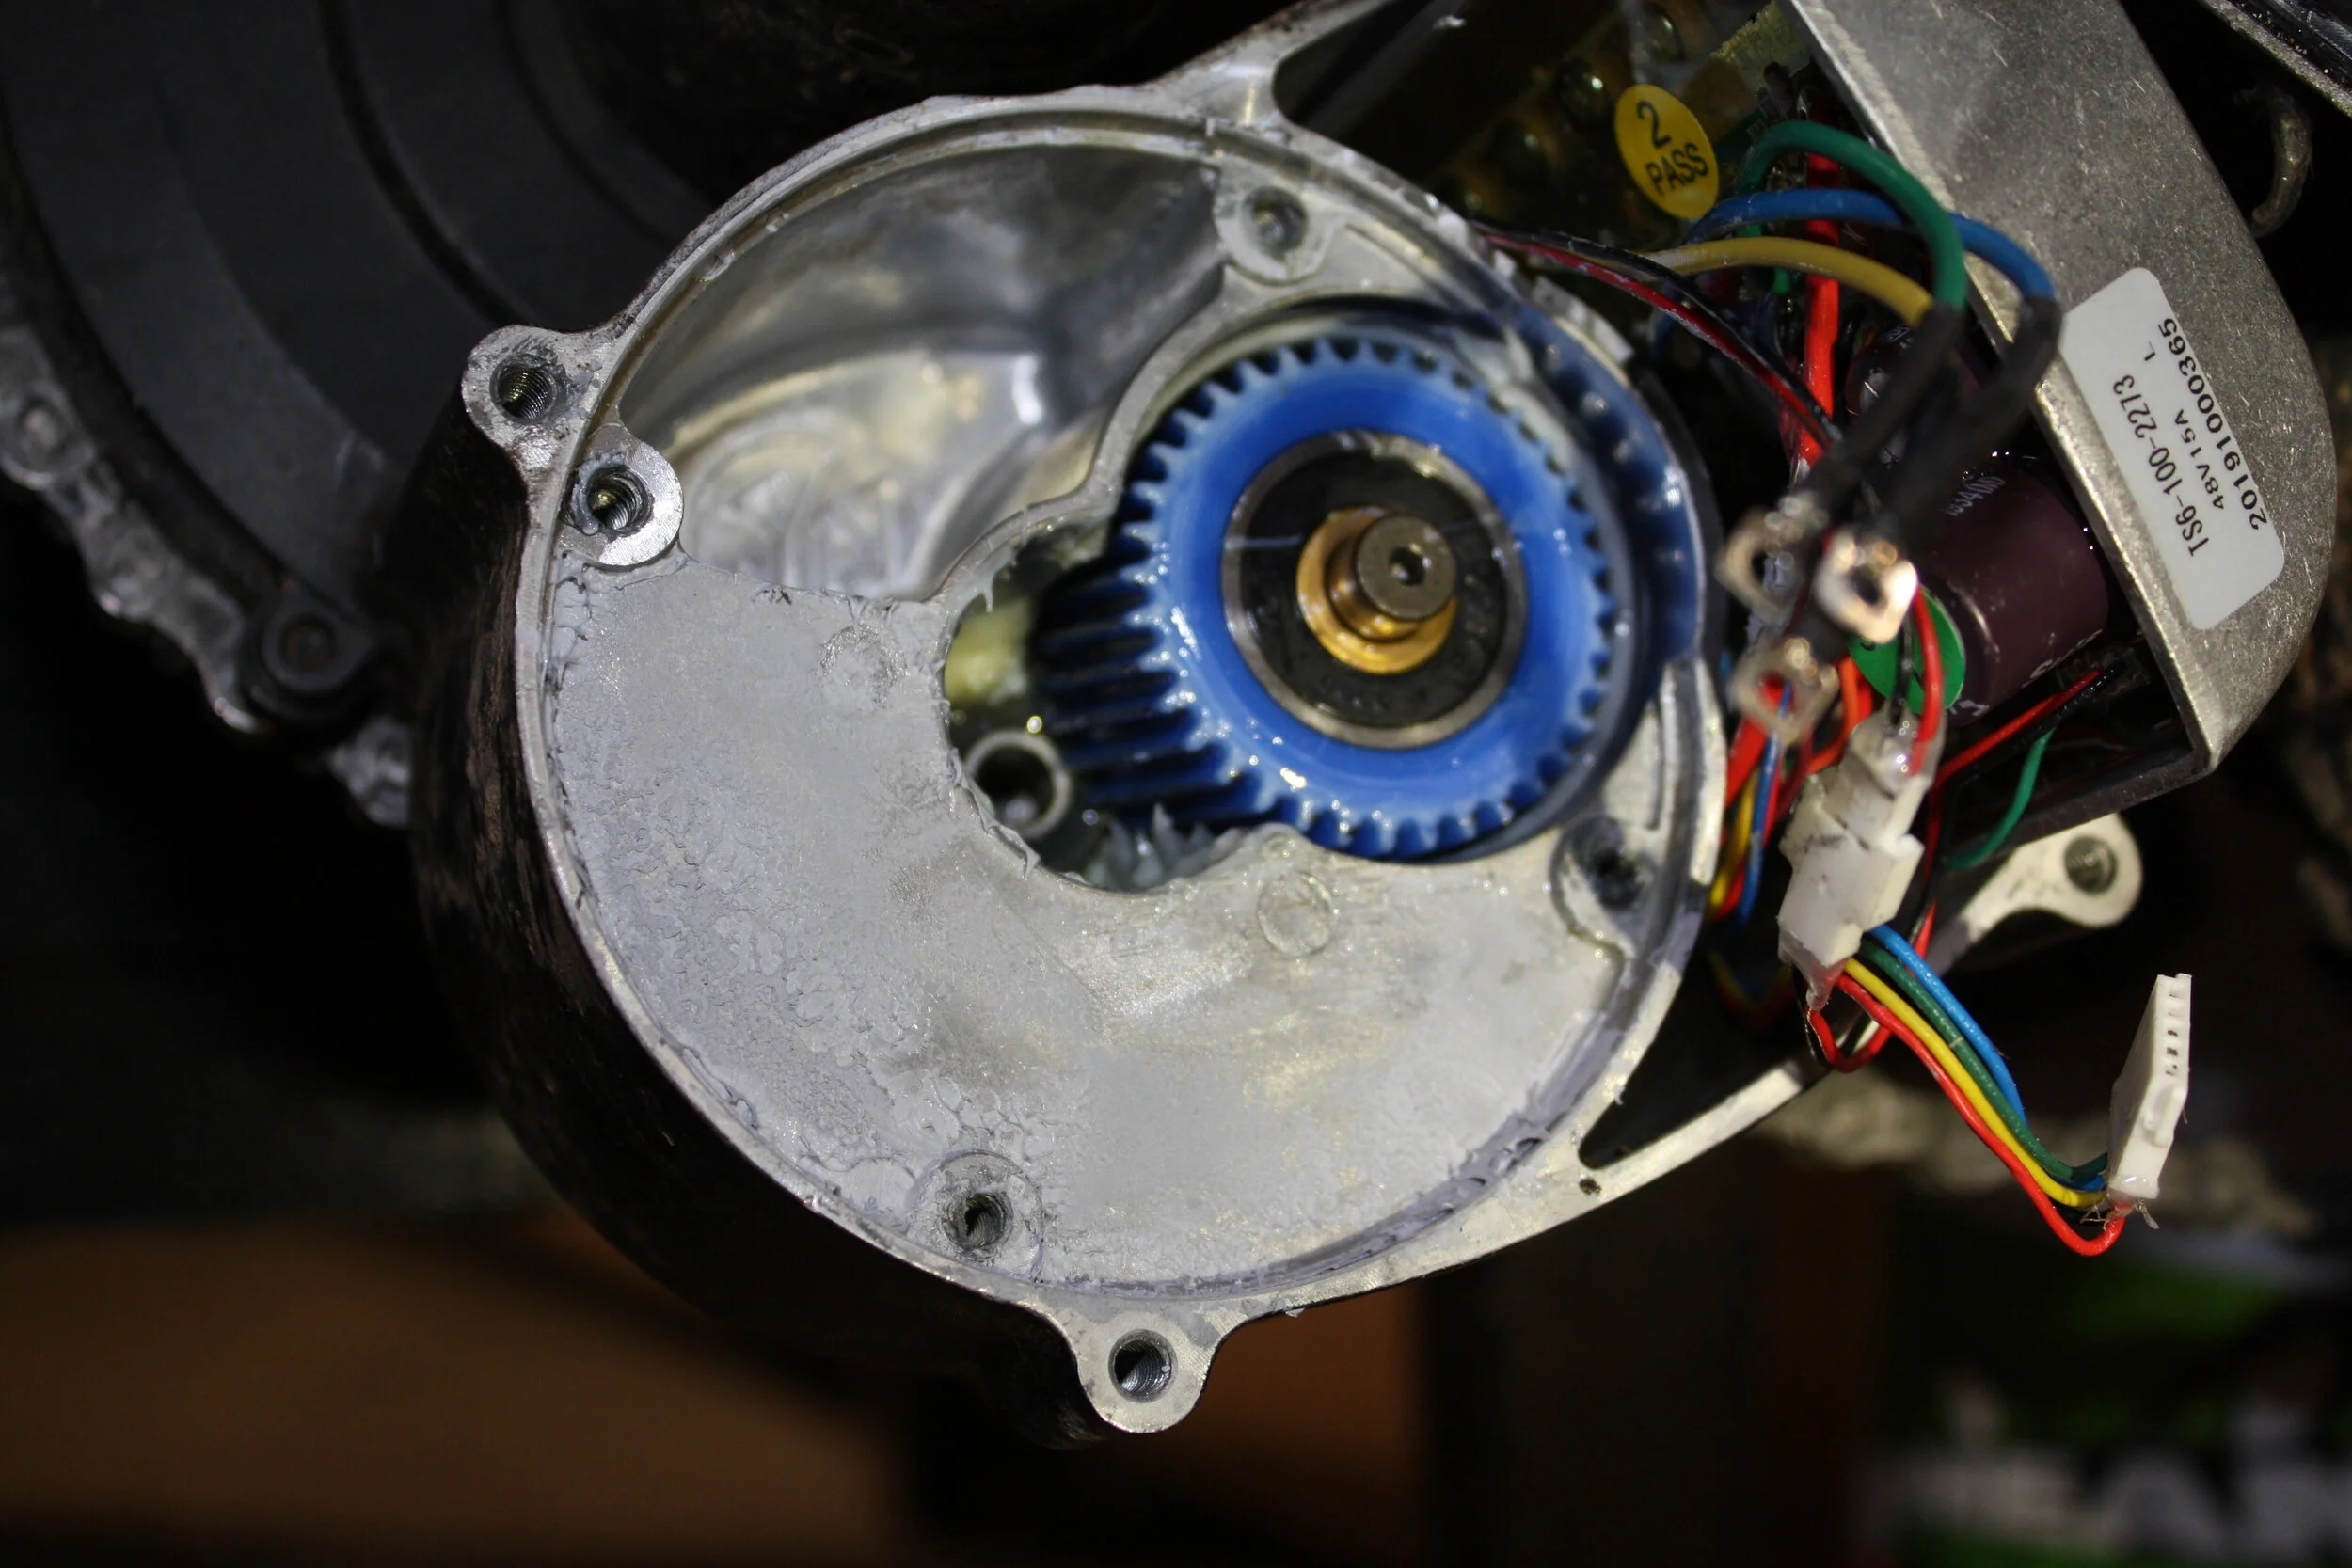
For all the advantages of the TSDZ2 it has some issues as well and one of the biggest issues is it’s poor motor cooling. For some unknown reason the designers though it was OK to just have the motor in an entirely sealed case with no contact to the aluminum body at all. With the stock setup it’s very easy to overheat the motor and if you don’t install the open source firmware thermal throttling or a thermal probe to keep an eye on the temperature it’s very easy to damage it in the process. Many past attempts have been made to remedy this and the most effective and easiest was by najbyk as shown in the wiki (https://github.com/OpenSource-EBike-firmware/TSDZ2_wiki/wiki/How-to-improve-motor-heat-dissipation) which filled the approximately 1.5mm gap between the motor and shell with thermal pads. The only problem with this solution is even at that thickness thermal pads have very poor performance so gains are limited. My simple solution to this problem was to just replace the pads with aluminum which is an order of magnitude more thermal conductivity than the pads. As a first test I hand cut shim a shim and after that performed wonderfully proceeded to CNC cut them for an exact fit. With the original test shim and the back thermal pads between motor and outer shell I was unable to get the temperature above 42C even with hard use. I expect the CNC version will perform even better since it is one piece instead of two sheets but the cold weather means it’s hard to tell real results from cold ambient assisted cooling.

IMG_8797.JPG

Due to how machining works making one of these shims was just as easy as making several so I’ve got a few more available if anyone is interested.

For those of you who are interested in installing one here is the step by step, mostly you can just follow the steps in the wiki linked (https://github.com/OpenSource-EBike-firmware/TSDZ2_wiki/wiki/How-to-improve-motor-heat-dissipation) and of course install the heatsink plate with some thermal compound instead of the thermal pads.

Breakdown:

Remove the motor cover (4 screws), then the motor (also 4 screws around the base), disconnecting the phase wires and encoder plug. The motor will probably require a bit of wiggling and pulling to slide out.

IMG_8786.JPG

Motor Tweaks:

As shown in the wiki, take apart the motor (6 screws) and apply some thermal compound between the motor endplates and the stator. My personal recommendation for thermal compound is MX-4 for it's good performance to cost ratio. Then reassemble the motor but be careful not to over tighten the motor bolts, they are M3 threads in aluminum so could strip easily if you apply too much torque.

Check contact points:

Check to make sure there are no casting marks on the motor endplate or gearbox case that stick up from the surface and would prevent the heatsink plate from sitting flat, the gearbox housings occasionally has some little ones that should be smoothed out.

Heatsink Plate install:

Apply thermal compound on the gearbox side of the heatsink plate in several small (about grain of rice sized) dabs. Install heatsink plate onto gearbox housing and press down as hard as you can, wiggling slightly. Wipe up any compound that oozes out from the edges. Apply compound to the other side of the plate in the same way and around the motor endplate perimeter (as shown in the wiki) and reinstall the motor.

Motor reinstall:

Tighten the 3 bolts closest to the heatsink plate first, evenly in a circle. Then snug up the 4th bolt. Reconnect the phase wires and encoder plug (little contact cleaner couldn't hurt hear if you've got some). Then just reinstall motor cover and enjoy the cool temps.

You might have noticed the tone in the this blog post is a little different. While this might come as a shock, I’m not the usual blogger for STO. But I hope this is an interesting and maybe even useful read.

-B

Airgun Moderator Design, Performance, and Development - Post-Peak Sound (part 20)

Silent Thunder Ordnance

Catch the previous episode HERE.

Catch the “BIG TEST” series, which preceded this post, here:
Standard flow - FX Crown .22 shrouded producing 32 foot pounds. Flow Factor 460

Moderate flow - FX Crown .30 shrouded producing 80 foot pounds. Flow Factor 1,111

High flow - FX Dreamline .30 unshrouded producing 87 foot pounds. Flow Factor 6,500

I’ve mentioned post-peak-sound repeatedly. It is that noise after the spike, which is difficult to quantify (yes, RMS has been tried and the results are…… messy) but which significantly affects perception. This is a story of attempts to make a better high flow Sarissa, as well as a test of the Brevitas at vastly more airflow than it was meant for and a quick glance at some materials experimentation.

Let me take you on a little journey here quickly. The idea of the current moderate and high flow diode architecture is to use the struts as flow paths to feed the diodes, and to enhance the feedback loop of sorts whereby the more backpressure is generated, the more it feeds the diodes to pinch off flow, resulting in more backpressure, so on and so forth. Obviously airflow is necessary for all this to function, it is something of an oversimplification, but you get the point. A challenge this creates though is one of length, this diode architecture occupies rather a lot of it per-diode which is to say per-choke-point. So I had an idea to create a quadrant diode, that is to say a diode which occupies a pie-slice of the circular area of the moderator tube. Each diode would also feed the next diode, just like in the “rev.2” architecture, but they wouldn’t be stacked on top of each other, they’d be stacked next to each other but slightly displaced longitudinally. Thus it would form a spiral, which would coil down the length of the moderator. These diodes would also be paired up, creating a fang-like obstruction to flow through the bore path. (paired to prevent POI shift and pellet destabilization by being symmetrical) Thus the “vipercoil” diode architecture. It is incredibly promising as an avenue of research, because it allows more choke-points, more impediment to flow within the design.

So what is the catch? Well there are two actually. The first issue is that, as you might imagine, at the start and end of the coil you have a whole bunch of partial diodes and space-filling to do, where that space is largely useless. And so back when I developed this initially and tested it in the context of a moderate flow Falx, the results were no better or slightly worse than the “rev. 2” diode architecture in terms of peak. So it languished for a while, but then the Sarissa came along, and with it a high flow variant unshacked from the constraints of length the way the Falx is. So I decided to try it again, in a high flow context, and superficially IT WORKED!!!! Peak reduction was just over 10 points (average) compared to a high flow Sarissa. So why then is this not the latest and greatest Sarissa-H you can buy now? Because of that post peak sound, the sound of the moderator draining.

vipercoil NFG.png

At the top you can see the vipercoil diode, the bottom the rev.2 diode. While the vipercoil has a small advantage in terms of peak, that post-peak draining sound makes the result sound noticeably louder to the shooter. Were I just measuring peak, I’d have never noticed. It is a great illustration of the value of a dataset comprised of more than just a number.

And another example of both high peak and high post-peak-sound. Don’t let the scale fool you, this was properly properly loud. This is mounted directly to the muzzle of the 87FPE .30 cal dreamline, 6,500 flow factor. The Brevitas really wasn’t rated for this much flow, or having no shroud to store some of that air/pressure. But I did abusive testing on it to ensure at lower flow factors it’d be good to go, and I was curious as to just how loud it really was. The answer is about 1213.0, with quite a sustained sound. In fact it appears, at this level of violence, some oscillation is definitely a problem for this design. Learn something new every day eh?

The final post-peak-sound subject at issue for this blog post has to do with the sound damping. Now to be clear, this affects both peak and post peak sound, really a win all around if it can be improved. The work with the Sarissa standard flow taught me a hard lesson that I needed to look at this area more closely. It is an extension of my original research, years ago now, to put the standard of felt up against everything I could lay my hands on to find the best materials available.

Well now I’m starting to take this a step further, fabricating my own damper materials from scratch, and experimenting with acoustic metamaterials. It is hard to say where exactly this will go, out of four tests three were failures, but one showed promise bringing a standard flow Falx down in peak by an average of about 7 points, compared to an otherwise identical regular Falx back to back. When you’re already down around 50 points, that is a significant performance enhancement. Shown below is an overlay of two traces, one from a successful damper experiment, one from an unsuccessful one. Clearly visible is the reduction in both peak and post-peak amplitude.

loaded vs. not damper.png

While it isn’t exactly ready for prime-time, it does provide a direction for other promising enhancements. Of course scalability of these parts is always a question and challenge, exotic materials made like this by hand one-at-a-time will not have the speed or consistency necessary for anything but prototypes. The goal here though is very much experimentation, baby steps at first to learn what I can, because it is challenging and fascinating. After that, if the experiments are successful, I’ll work on the manufacturing engineering aspects to try and get these into other people’s hands so they can enjoy them as well. :)

Product Introduction - Glowy Stuff

Silent Thunder Ordnance

Somewhat unusually for one of our product introductions, this isn’t a new single product, but several in addition to the revamping of existing product lines.

At the core of this is a major update to our glow technologies to offer brighter longer lasting glows from products with better F&F and do it all in exciting new colors. Everything is just better. (more information on the colors and technologies can be found HERE)As can be clearly seen, we’ve also broken out of the various shades of off-white under daylight which typify most glow-products. Pictures really can’t convey just how bright and vibrant these colors are, the improvement is huge.

Pictured above is a Spyderco Autonomy 2. We’ve long offered a button insert for the Spyderco Autonomy line, but now it is even better. The slot for a tritium vial, and manipulation holes for easy installation remain. New though are glowing lanyard-hole-inserts and a glowing (optional non-glow) safety switch block to prevent accidental safety switch engagement. We offer these for a handful of different knives including the Spyderco Autonomy line, Para2, Manix (6.4mm lanyard hole variants), Spyderco Caribbean, and Busse/Bussekin rivet holes (Swamprat Knives and Scrapyard Knives), with more designs to come. While the brightness of the insert’s glow makes it hard to see, each is a tri-oval of a solvent resistant rubber. Installation couldn’t possibly be any easier, gently press it into place and friction will hold it securely. Want to swap? Just press it back out again.

Pictured above are an assortment of our flashlight tail-rings. These are a simple affair, a friction fit ring which sits around the rubber tail boot of your flashlight, making it easy to find in the dark. Most of our colors will coolly glow all night long on your nightstand. Custom tail-rings for unusual applications can be special-ordered. (such as the switch guard for the modified Amutorch AL1 titanium 70kcd 530m ANSI throw pictured below)

We’ve got glow inserts for scalpeldashi sheaths. If you’re like us, and carry more than one dashi to keep different blades quick to hand, this is a great way to tell which is which at a glance, day or night. (side note, big fans of #10A and #16 blades) It also adds that little bit of specialness to your EDC lineup, any time you walk from somewhere brighter to somewhere darker, you can glance down and see your pocket glowing.

And finally, we’re able to integrate our newer better glow tech into almost all of our other products. Have a specific application in mind? Something you’d like to be able to use or just find in the dark? Or maybe just something you want a bit flashier? Get in touch.

Product Introduction - Precision Pellet Caddie

Silent Thunder Ordnance

IMG_20201016_102906714_HDRE.jpg

We all spend an inordinate amount of time trying to improve airgun accuracy. Finding the perfect pellet, the optimal tune, a better scope, rangefinder, ballistic calculator, better barrels, barrel treatments, regulators, hand sorting/sizing pellets, the list goes on and on.

What about the pellets themselves though? What if they could be kept in pristine condition, protected from the normal myriad of dings and dents and deformed skirts which rob accuracy? Enter the Precision Pellet Caddie, the primary goal of which is to protect pellets while still allowing quick and convenient access.

No more pop-tops which open in your pocket, or screw lids which take a little fumbling to get started and several turns to open or close. The lid of the pellet caddie is securely held via 6 radial lugs, much like a firearm bolt, and opens with a crisp 30 degree throw. The pellets contained within are protected on all sides, not just top and bottom. Interchangeable inserts allow the user to choose their preferred level of protection.

The ring insert protects pellets from crashing into the sides of the caddie, ensuring there is cushioning no matter which way the caddie is rotated. No gaps in this armor.

The baffled insert offers four separate sections to better protect pellets from each other. Not sure how/why it works? Imagine a single layer of pellets laying loose on the bottom of the caddie which has been set on a horizontal surface. What happens if you pick it up, and turn it on its side to slip in a pocket? The pellets sitting near the edge of what is now the lowest point won’t have far to fall, but the ones near what is now the highest point have to fall almost the full width of the caddie onto other pellets……. unless you use a baffled insert, then they can only fall as far as the next baffle, a much shorter distance. But wait, there’s more. Why don’t your pellets come all beat up? The reason is because they come in a full container, they can’t fall or slosh around at all because they’re constrained by other pellets. This is the other big advantage of the baffled insert, fill all four sections but use them one at a time so most of the pellets remain constrained. Another advantage is it allows the carrying of multiple types of pellets, keeping each separate.

The individual carrier is the ultimate protection. Do you hand size or sort your pellets? Why would you then let them rattle around at all? Each pellet is fully constrained in a caliber-specific insert, held firmly enough not to fall out yet gently enough not to be damaged.

And, finally, if you’re going to make something useful, why not also make it beautiful? Polished faces and rich colors give that extra little “pop” visually. Custom colors, materials, glows, and engraving, are all available, priced on request.

IMG_20201014_151640606_HDRB&W.jpg


Airgun Moderator Design, Performance, and Development - THE BIG TEST; MODERATE FLOW

Silent Thunder Ordnance

A goal of the “big test” series is to provide an ongoing reference to the performance of different moderators at different flow levels. Moderators will be added and charts will be updated periodically however the majority of the text will not be. If you have a moderator you’re curious about, please feel free to get in touch, we’re happy to test it and add an entry below so everyone can benefit. The test series are linked below:

Standard flow - FX Crown .22 shrouded producing 32 foot pounds. Flow Factor 460

Moderate flow - FX Crown .30 shrouded producing 80 foot pounds. Flow Factor 1,111

High flow - FX Dreamline .30 unshrouded producing 87 foot pounds. Flow Factor 6,500

An immense thank you to everyone who has loaned a moderator for testing purposes here. This project would not be possible without you, and with your help will keep growing. So, again, thank you!

The test protocol

The muzzle of the moderator is exactly parallel to the pickup, and separated by exactly one meter. The milspec protocol for firearm suppressors is 1.6 meters off the ground, and that is replicated here except when there is snow on the ground, in which case the pickups are placed 1.6m above the surface of the snow. Two pickups are used, next to each other, and equidistant from the moderator. Each test was five shots. The results are an average of that, so ten datapoints. The numbers are raw output, and have not been converted to decibels. I hand select each sound profile (image) which I feel is representative of the moderator's overall performance. The host gun is as stated above. All tests were done with the shroud fully retracted, excluding the shroud-only test.


VP Shroud Extended.png

FX Crown .30 shrouded Factory configuration w/ extended
Sound - 637.6

Its loud, albeit the peak is over quickly and remaining sound substantially lower although still surprisingly loud. At one point in time anyway FX considered this quiet enough to stand on its own. This puts me in mind of RMAC 2018 incident where Giles was woken up by a similar setup through a wall/window. I would rate this as not backyard friendly. As an aside, since it has come up before, all the moderator tests were performed with the shroud fully retracted, this is the only shroud-extended instance.

VP clague.png

Clague
Sound – 136.3
Mass (grams) – 325
Volume (mm^3) – 493,214
Length (mm) – 276
Diameter (mm) – 47.7
Exit OD (mm) – 9.6

You’ll note that, over a year ago, I tested this same Clague on this same gun for an average of 115.6. How did it gain 15 points? I do a quick cross-check on the rifle’s sound signature before running these tests to ensure reasonably consistent performance, and while a little variation from day to day is expected, this is outside that typical range. I do have an explanation though: designs like this which set up oscillations are quite inconsistent, which isn’t obvious from the average. Run a test where several of the shots peak high against one where several of the shots peak low and your averages will come out a bit different. What remains is the 80’s laser-blast sound that accompanies this moderator/host combination.


VP donnyFX.png

Donny FX
Sound – 207.3
Mass (grams) – 135.5
Volume (mm^3) – 118,941
Length (mm) – 126.5
Diameter (mm) – 34.6
Exit OD (mm) – 8.04

To the subjective ear, there is definitely a bit of a puff/whoosh going on here. Again an internal oscillation is set up such that the peak is not from uncorking, and this contributes to the moderator sounding louder than it actually is.


VP emperor.png

Donny Emperor
Sound – 100.0
Mass (grams) – 438.2
Volume (mm^3) – 536,804
Length (mm) – 266
Diameter (mm) – 50.69
Exit OD (mm) – 9.5

There is a real perception of weight on the end of the gun with this moderator, and the barrel droop (thanks in part to FX’s less-than-ideally-rigid barrel system) is noticeable even off-handing the rifle into a large backstop while doing sound tests. Aside from that though, it sounds relatively quiet. Some combination of pop and hiss. In general moderators tend to sound louder to someone parallel to the muzzle than to the shooter, however for whatever reason the Emperor sticks in my mind as a design which enhances this effect. (note all tests are taken 1m away from the muzzle and parallel to it, 1.6m off the ground)


I want to put a break here between the commercial moderators tested and my experimental moderator designs. The obvious “conflict of interest” aside, I can’t overstate the value of having both the host and test equipment on hand when working on designs. For every success or noteworthy design that ends up in the blog series, I have many MANY failures. Posting only the culmination of my work as a direct comparison is somewhat unfair, hence the break. So please keep that context in mind.


FalxTD rev.2.png

Falx Moderate Flow
Sound – 89.4
Mass (grams) – 180
Volume (mm^3) – 213,628
Length (mm) – 170
Diameter (mm) – 40
Exit OD (mm) – 8.4

This is about the right size for this flow factor with this gas diode design in my opinion, if size is a concern and ultimate sound atenuation is not the goal. More length would obviously offer space for further improvement, but after experiments with the Mus, Gladius, and now Sarissa I believe the lion’s share of the peak-reduction has been had in the Falx. The sound is more of a quick puff, it doesn’t have much “pop” to it.

Sarissa rev.2 TD.png

Sarissa Moderate Flow
Sound – 73.3
Mass (grams) – 260
Volume (mm^3) – 320,442
Length (mm) – 255
Diameter (mm) – 40
Exit OD (mm) – 10*

*Note this moderator runs a tapered bore, which starts at 8.4mm at the rear and opens up to 10mm at the exit to reduce the chances of clipping.

But for the hiss of the pellet flying through the air, you could confuse this with a 30FPE shrouded .22. As self-aggrandizing as it sounds, that is the best description of this moderator’s sound profile I can offer. And the data supports this. About a year ago, in what is now called the big test for standard flow, this is what a good performance looked like from a conventional moderator design mounted to the FX Crown .22 both in peak and the trace.

Brevitas *tested 5.7.20*
Sound – 609.3
Mass (grams) – 30
Volume (mm^3) – 45,565
Length (mm) – 74
Diameter (mm) – 28
Exit OD (mm) – 9.0

This is the loudest of my moderator designs. It is not quiet at this flow factor, no two ways about it. The peak is comparatively high, and the absence of a devoted sound damping section results in sustained sound which also contributes to the perception of loudness. So whats the point?

All moderator designs though are necessarily a balancing act between size/weight and sound attenuation. This design was an experiment to try and find the smallest practical and effective moderator possible. The diameter is limited by the shroud, smaller than the Crown’s 28mm shroud would look goofy, so from there it was a question of how short it could be made. While shorter versions were tested, the ultimate conclusion was that 74mm was necessary without unreasonable sacrifices to acoustic performance. To put it another way, while not quiet, this design is quieter than the naked host with its shroud extended (factory “quiet” configuration) while adding about half the length.

That isn’t the only thing experimental about this design though. While all my moderators are experimental, this one takes it to a new extreme by using experimental materials and manufacturing technologies, as well as experimental designs. This is what, ultimately, allows its unusual combination of performance attributes.

Airgun Moderator Design, Performance, and Development - THE BIG TEST; HIGH FLOW

Silent Thunder Ordnance

A goal of the “big test” series is to provide an ongoing reference to the performance of different moderators at different flow levels. Moderators will be added and charts will be updated periodically however the majority of the text will not be. If you have a moderator you’re curious about, please feel free to get in touch, we’re happy to test it and add an entry below so everyone can benefit. The test series are linked below:

Standard flow - FX Crown .22 shrouded producing 32 foot pounds. Flow Factor 460

Moderate flow - FX Crown .30 shrouded producing 80 foot pounds. Flow Factor 1,111

High flow - FX Dreamline .30 unshrouded producing 87 foot pounds. Flow Factor 6,500

An immense thank you to everyone who has loaned a moderator for testing purposes here. This project would not be possible without you, and with your help will keep growing. So, again, thank you!

First, a brief nod to the host which is a power-modified FX Dreamline .30. The lack of a shroud significantly increases the flow factor, that is to say the air it serves to the moderator, and in turn increases the loudness substantially. More about the building of the host can be found HERE.

The test protocol

The muzzle of the moderator is exactly parallel to the pickup, and separated by exactly one meter. The milspec protocol for firearm suppressors is 1.6 meters off the ground, and that is replicated here except when there is snow on the ground, in which case the pickups are placed 1.6m above the surface of the snow. Two pickups are used, next to each other, and equidistant from the moderator. Each test was five shots. The results are an average of that, so ten datapoints. The numbers are raw output, and have not been converted to decibels. I hand select each sound profile (image) which I feel is representative of the moderator's overall performance. The host gun is as stated above. All tests were taken with the moderator directly mounted to the muzzle, with no shroud or any other reflex volume.


Dream Power Bare.png

FX Dream .30 power tune no-shroud (bare muzzle)
Sound - 3,668.4

Don’t let the modesty of the trace fool you, it is just the scale. This was properly loud, as in there are bare-muzzle firearms which are quieter than this kind of loud. I wore hearing protection and was glad of it. As I noted before, that little spike well after the peak is likely sound reflecting back off some surface.


Dreamline DonnyFX.png

Donny FX
Sound – 448.7
Mass (grams) – 135.5
Volume (mm^3) – 118,941
Length (mm) – 126.5
Diameter (mm) – 34.6
Exit OD (mm) – 8.04

As I covered in a previous blog series HERE, this moderator probably isn’t really suited for this flow factor/host. That said, it came with it and there is no indication on the manufacturer’s website suggesting this innaplicability, so why not put the results here? At bare minimum, it should provide a good basis for comparison. What sort of performance would/should you expect from a small-ish moderator on a high flow gun?

It wasn’t exactly quiet, but that was to be expected. What was unexpected was that it set up an internal oscillation whereby the peak was not the uncorking event. This sustained sound contributed to the perception of loudness, and looking again could possibly have clipped the scale resulting in an erroneously low reading. To the subjective ear this was a whistle-y hiss-y sort of sound. All in all though, it was quieter than I had expected. I took my hearing protection off to listen to it for two of the shots.


Donny EMP dream30.png

Donny Emperor
Sound – 141.0
Mass (grams) – 438.2
Volume (mm^3) – 536,804
Length (mm) – 266
Diameter (mm) – 50.69
Exit OD (mm) – 9.5

The “Emperor” is the largest moderator DonnyFL offers. It also has the largest internal volume of any moderator yet tested, and has the most mass with which to absorb energy. A high flow rifle seems like the application it was made for. I should note this EMP on loan is different from the one loaned for the standard flow test. This one was recently purchased and should be, at the time of writing, the latest gen. I’m told it was sold for “.177-.30 cal” and that appears to be consistent with its bore diameter. Other than the exit bore and slight difference in mass, it appears to be identical to the other example tested.

The perception of this is not “mousefart,” there is a distinct pop followed by a whoosh. This is much more clearly perceptible from the side or near a sound-reflective-surface, than it is from the shooter’s perspective.


Dream Clague.png

Clague
Sound – 148.3
Mass (grams) – 325
Volume (mm^3) – 493,214
Length (mm) – 276
Diameter (mm) – 47.7
Exit OD (mm) – 9.6

This Clague has not done well in previous tests. While I strive to keep these impersonal and unbiased, I really hoped that this would be a chance for the Clague to shine. It goes big in the length, mass, and volume department, which doesn’t always work out well for standard flow rifles. It picked up some weird resonance when tested at moderate flow levels, which may have been part of an interaction with the shroud. It is possible though that here at the higher end of flow, things could start to work out. This isn’t purely imagination or wish fulfillment either. This Clague was allegedly (I’m not the original owner) made for an FX Impact .30. Impacts tend to be a slightly lower flow factor than their Crown counterparts of equal power, but based on the shape of the cone at the rear it may have been intended for one without a shroud. While I have not found anything from Mr. Clague to suggest he tunes his designs for flow factors or equivalent, my understanding is that they are made-to-order for the customer’s requested application.

The Clague again sets up a resonance here, although to my ear it was less distinct than on the Crown. While being fairly close numerically to the Emperor, the post-peak-sound here creates the impression that it is louder but not by a huge margin, and it is both smaller and lighter. So, in that regard, I would say the Clague held its own against the EMP.


I want to put a break here between the commercial moderators tested and my experimental moderator designs. The obvious “conflict of interest” aside, I can’t overstate the value of having both the host and test equipment on hand when working on designs. For every success or noteworthy design that ends up in the blog series, I have many MANY failures. Posting only the culmination of my work as a direct comparison is somewhat unfair, thus I wanted a break between the two, so please keep that context in mind.


Falx H.png

Falx High Flow
Sound – 135.3
Mass (grams) – 180
Volume (mm^3) – 213,628
Length (mm) – 170
Diameter (mm) – 40
Exit OD (mm) – 8.4

While lower flow-factors taught the hard lesson that bigger isn’t universally better, at this flow factor the lack of size of the Falx is definitely a limiting-factor when it comes to performance. The peak is relatively low, all things considered, that much is good. Less good is the audible “whoosh,” the sound of the diodes draining. Without somewhere for them to store that extra air for longer, such as a shroud, it just has to come tiraiding out sooner and makes more noise doing so. Put a different way, it is surprisingly quiet for its size, but it still sounds like a powerful airgun.


Sarissa H.png

Sarissa High Flow
Sound – 107.8
Mass (grams) – 260
Volume (mm^3) – 320,442
Length (mm) – 255
Diameter (mm) – 40
Exit OD (mm) – 10*

*Note this moderator runs a tapered bore, which starts at 8.4mm at the rear and opens up to 10mm at the exit to reduce the chances of clipping.

The point of the Sarissa was to take the proven concepts of the Falx, but free them from its size constraints. There is just more room, which is filled with more sound damping and an additional gas diode. Both the peak and post-peak draining are remarkably quiet for this kind of air. The hiss of the pellet moving through the air is readily apparent.


Brevitas *tested 10.29.20*
Sound – 1213.0
Mass (grams) – 30
Volume (mm^3) – 45,565
Length (mm) – 74
Diameter (mm) – 28
Exit OD (mm) – 9.0

The Brevitas was not meant for this. Without a shroud to store the backpressure being generated, there is no possible way it could perform well, and indeed it didn’t. It only seemed fair though to give it a beating. I do want to make crystal clear though that the Brevitas is NOT rated for this flow factor, despite having endured this test and more with no apparent ill effects. So what did it sound like? Loud. Uncomfortably loud. Unpleasantly loud. Loud like you want to wear hearing protection loud. The only kind thing I can say about it, is that it is an improvement over the Dreamline’s bare muzzle, shrouded or unshrouded. It is loud, and it is fairly sustained. Don’t let the scale fool you, there is nothing quiet about this muzzle report. I do believe I’m correct in saying this is the loudest measurement of a moderator I’ve ever taken.

Airgun Moderator Design, Performance, and Development - The Sarissa and a Dream (part 19)

Silent Thunder Ordnance

IMG_20200818_105222475E.jpg

Catch the previous episode HERE.

There is a lot to cover here, the formal introduction of the Sarissa though some variants have been available for some time, the introduction of a new test platform and the journey that took, and the announcement of Silent Thunder Ordnance picking up airgun related products thus making my pokey little adventures in airgun moderator and accessory design that little bit more formal.


An acoustic excerpt

Before launching into the primary content of this blog post, I wanted to share an excerpt from another blog I’d been reading. I bang on and on about how subjective the ear is, and how sustained sounds are perceived as louder than they really are. While there are a lot of interesting phenomena here, one in particular jumped out at me as relevant to my reader’s (your) potential interest. It is a simple plain-English explanation of some of the mechanics behind impulse sound in the human ear:

“As mentioned in the introduction, when confronted with a high-intensity stimulus, the middle ear muscles involuntarily contract. This decreases the amount of vibrational energy that transfers to the sensitive cochlea, which converts sonic vibrations into electrical impulses for processing by the brain. Basically, the muscles close to protect the more sensitive structures of the ear.

The brain interprets the dynamic signature of these reduced-loudness sounds, with the initial loud transient followed by immediate reduction when the ear muscles respond. The result? It still senses ‘loud sustained noise’.” - (ref. output.com/blog/9-sound-design-tips-to-hack-your-listeners-ears)

For those interested, I would of course encourage reading the entire post, acoustics is both a fascinating and bottomless subject.


Officially launching airgun products

Silent Thunder Ordnance officially is offering airgun products. For the time being moderators remain experimental and in their own special place, however that hasn’t stopped us from bringing a few little whizz-bangs to market which might make people’s airgunning-lives better. For a start, all the digital design files available for free download are now visible and easy to find from the main website. They will remain free, available, and hopefully useful to the community. We ask only that they not be re-hosted, as the designs will be updated, modified, and added to over time, simply link back to the source here where they will ALWAYS be free to download.

The shroud depinger is, so far, the only acoustic experiment from airgunning land that has made it out into the wild. This deceptively simple and vastly underrated item simply prevents sound resonating in the shroud of your airgun, improving sound signature. In some cases the results are subtle, in others pronounced, but given that it only costs a couple bucks, is easy to install, and weighs practically nothing we use them like bacon; put it on EVERYTHING!

Finally is the pellet baffle. There is something of an unending quest to try and find a better way to carry pellets. And all the requirements are contradictory. You want them to be secure, but quickly and easily accessible. You want it to be compact, but contain many rounds. You want it to be cheap, but you want it to be good. And, most importantly, you do not want your pellets to be damaged by banging into each other or the sides of the tin. Meanwhile, we’ve all got stacks and stacks of JSB pellet tins. These tins, somewhat unusually, contain foam padding on the top and bottom. This is great for keeping the pellets safe when the tin is full. Trouble is, as the tin starts to empty, pellets can slosh around from side to side. Every time you turn the tin on its side, some pellet falls the almost 100mm (roughly 4”) from what is now the “top” to either the bare metal edge or some other unfortunate pellet below it. There has to be a better way right? Enter the pellet baffle. It drops into your standard JSB pellet tin, no fuss, and has four separate compartments which keep the pellets separate from each other and from the walls of the tin. Consume them one at a time, keeping pellets firmly packed so they don’t bang into each other until they’re used, and even once there is “space to slosh” the distance one can travel is much shorter and any impacts cushioned. Each baffle is made of the same sort of foam used in premium cases for guns, electronics, instrumentation, really anything you take into the field. Simple, effective, cheap.

All this thinking about, and testing of, pellet containers has lead to some interesting ideas for an “ultimate pellet tin,” which if people have input on we’d love to hear. For now though, we’ve got some ideas and are experimenting with some designs. What will become of it is hard to say, but just maybe we’ll be able to roll out a better mousetrap for carrying pellets.


A more powerful test platform (or higher flow factor at least)

It has become increasingly clear that the FX Crown .30 isn’t what I initially thought it was, which is to say it doesn’t represent the “upper bound” of “reasonable power” for the “majority of airguns” at least as far as a moderator is concerned. Some of this is simply down to an unexpected surge in the popularity of slugs. Some of this is down to FX’s pioneering research into barrels and airgun modularity. And some of this is down to the Crown .30 just being too damn efficient and having too generous and effective a shroud. What then can serve the role of a higher flow factor test platform?

There are lots of options, but relatively few great ones. Lets eliminate the obvious: the Airforce Texan is out. Why? Lots of reasons actually, but chief among them is that the platform is unregulated. This means that, like the AAA Slayer, even though some shots have consistent velocity every single shot meters different. Okay so it needs to be regulated, and not just regulated, but have a nice consistent regulator. As I follow a lot of subtle trends, chipping away a few points with a little tweak here or there, shot-to-shot inconsistency requires large sample sizes which are wasteful and time consuming to generate. That leads to another obvious option: the FX Impact. Now I’m getting nitpicky, but they’re awfully expensive, and in my opinion have just crossed over to the wrong side of the mechanical complexity/elegance line. They’re also so popular it is hard to get your hands on one at the moment.

Alright so consistent regulator, high(er) flow factor, preferably not super expensive, good air supply, modular (snuck that one in there), and available. How about an FX Dreamline with a few mods? Perfect! The astute will cry that the Dreamline is no more powerful than the Crown, and that is oh so true, but the story doesn’t end there. The Dreamline can easily accept an effectively unlimited number of plenum extensions. That is handy. It also, unlike the new “ultralight” barrel Crowns, can readily have its shroud removed and take a direct mount moderator with no modification. For those paying attention to flow factor, this alone provides a big boost in the amount of air being served up hot and fresh to the mod.

And there is one final twist here: the Dreamline is a popular, instead of just throwing all this together and seeing where I end up, the plan is to incrementally increase performance, carefully documenting things along the way, to help out the next guy who may be interested in replicating at least some of the work done here.


The factory tuned FX Dreamline

Dreamline Factory Configuration:
75FPE w/ JSB 50.15g pellets shooting avg. 820fps. Flow Factor w/out shroud 5690. Flow factor w/ shroud 2370 assuming a shroud factor of 2.5. (flow factor w/ hypothetical Crown shroud would be 948 for the sake of comparison) This shows the Dreamline more or less doing exactly what you’d expect, it is a little less powerful than the Crown .30 in factory configuration and uses a correspondingly smaller amount of air.

This rifle is also loud, PROPERLY loud, no surprise it ships with a moderator as standard as you’ll see below. Something of note here though is it shipped with a DonnyFX with an 8mm bore. That seems awfully snug for a .30 to me, less than 0.2mm clearance between pellet and moderator bore. By comparison, the minimum clearance I’d recommend for a .30 is 8.4mm which provides TWICE the bore clearance. No surprise then the Donny came clipping too. These are all advertised as coming with DonnyFX moderators, I think someone just put the wrong one on. Since it is how the rifle came though, and came loctited on I might add, I figured I may as well make hay and test it in factory configuration. I should add here quickly that, while the gas diode technology I use is, by design, relatively bore agnostic, the same can not be said for more conventional designs like the Donny; acoustic performance is very likely improved by this snug bore.

I want to note quickly that, as per usual, all these traces are not to scale!

FX Dream .30 factory tune shrouded w/ Donny FX (clipping) FULL FACTORY CONFIG AS-SHIPPED - 189.0
This is not quiet, no two ways about it, but admirable given the circumstances. I guess the best way to put it is that this is substantially quieter than the Crown .30 in factory configuration with its shroud extended, but you’d never mistake it for anything other than a powerful airgun by listening to it. It is quite a sustained sound, as you can see from the trace below. The peak is not an uncorking sound, but the moderator “whistling” as air tirades through it. This contributes substantially to the subjective perception of loudness.

Dream factory tune shroud donny as-shipped.png

So that is great and all, but what is it a reduction from? How much work is that mod really doing? What does the gun meter with no moderator? Well step one was getting it off, a not-insubstantial challenge given the red loctite holding it on, but far from impossible. I also wanted to pull the shroud, a much easier task, to increase the flow-factor, and see just what sort of violence this thing is capable of.

FX Dream .30 factory tune shroud only - 1,754.9
Normally I only see readings in this range testing firearm suppressors. It is loud. I wore hearing protection and was glad for it. You can see here that the shroud, particularly without a moderator, isn’t holding terribly much pressure as the trace tapers very quickly. Still better than nothing right?

FX Dream .30 factory tune no-shroud (bare muzzle) - 2,578.0
This is quieter than most un-suppressed firearms, but certainly not all. I’m not sure what I was expecting. I suspect that random peak all alone on the right hand side of the long-view trace is the sound reflecting off something. Note it is in the trace above as well.

Dreamline Factory Tune Bare Muzzle.png

FX Dream .30 factory tune no-shroud w/ Donny FX (clipping) - 370.0
I figured while I had it on hand I’d throw the Donny on in this configuration as well. This is louder, no surprise. To give you a little context, as the scale I use is non-linear, this is equivalent to more than doubling the distance between yourself and the sound source. So, even though the dreamline’s shroud is tiny, removing it and using this DonnyFX mod in both cases is the difference between the hearing the gun at over 100 meters to hearing the gun at 50 meters. It is a great illustration of why the shroud factor is so important to calculating flow factor, even the teenie-weenie shroud in the Dreamline, most of which is full of barrel sleeve anyway, makes a HUGE difference.

Dream factory tune no shroud DonnyFX.png

The point of this rig though is to develop higher flow variants of the Sarissa and potentially Falx. To do this I would like a bit more, and the Dreamline will not remain in factory configuration. Power and flow will necessarily increase, “invalidating” all of these tests for future comparisons. As a result I’ll breeze over a lot of the experiments I did pre-modification, but wanted to throw the two obvious ones out, the experimental high flow Sarissa and the moderate flow Falx. To be clear, the latter wasn’t meant for this, but I was curious how it’d perform. Everything I’ve learned about this diode technology so far suggests that, as guns get more powerful, it will become more effective relatively speaking. After all, it is fundamentally based on a feedback loop whereby the more air you dump into them, the more they are able to push back.

FX Dream .30 factory tune no-shroud moderate flow Falx - 124.3
I was pleasantly surprised by the result, especially as it is about five times the flow factor it was tuned for. It wasn’t particularly loud or whistle-y. It is a testament to the improvements of the rev.2 design’s diodes specifically. You wouldn’t mistake it for a moderated .22 at 30FPE, but It makes me think that a high flow variant of this design could improve this performance substantially. Less than 100 is my goal, but I’d like to achieve that on the final higher power tune of the Dreamline. I’m writing this blog post as I go, over the course of these experiments weeks if not months will have elapsed, so we’ll see down below if I manage it. As I write this though, I have no idea.

Dream Factory Tune Bare Muzzle Falx TD.png

FX Dream .30 factory tune no-shroud high flow Sarissa (experimental rev.) - 71.0
This one floored me. You really could confuse it with a 30FPE .22. Given that it is a snarling barking almost 6K flow factor .30 cal running a first-generation experimental moderator core this was the last thing I expected. Rarely do my initial moderator experiments meet with success, usually I’m a few failed experiments deep before something is really working. Maybe this means I’m actually starting to figure this stuff out? *shrug* I guess we’ll see as this rifle gets more powerful.


Power enhancement

Step one, obviously, is to add a power plenum. Step two, perhaps slightly less obviously, is a second power plenum. Why two? More bigger more better? So, hypothetically speaking, performance as plenum size increases should asymptotically approach a performance ceiling, all else remaining unchanged regarding the rifle’s tune. Practically speaking, that ceiling will resemble that of an unregulated rifle at its peak power; a “plenum” the size of the full air reservoir. The point? A little napkin math suggests that a reasonable performance increase will be observed in this rifle from the addition of a second plenum extension, and, as they’re a pretty cheap thrill, why not? There is a wrench in the works with this though, as there appears to be a choke point in the Dreamline’s plenum between the extension and the valve which is part of the valve-return assembly. So we’ll have to see how this all works out. Hopefully, if nothing else, it’ll provide useful information to someone else out there. I am aware that stacking multiple plenum extensions has been done already with the dreamline, but none of the writeups I could find listed gains from each additional plenum.

Original
FPS w/ 50.15 - 820
FPE w/ 50.15 - 74.9
Flow factor (calculated) - 5690

1 Power Plenum
FPS w/ 50.15 - 845
FPE w/ 50.15 - 79.53
Flow factor (estimated) - 6040
Power increase - 5.8%

2 Power Plenums
FPS w/ 50.15 - 855
FPE w/ 50.15 - 81.43
Flow factor (estimated) - 6190
Power increase - 2.3%

So a second power plenum added just shy of half the performance of the first. Not too shabby. A third might not be all that helpful though. ;) Hammer spring tension is rarely maxed out on these guns from the factory, so the next obvious step is to max that out and see where the plateau is.

2 Power Plenums HST adjust only
FPS w/ 50.15 - 865
FPE w/ 50.15 - 83.34
Flow factor (estimated) - 6335
Power increase - 2.3%

The plateau actually occurred with the HST less-than-maxed-out. So the next obvious step is to increase the reg a little bit and give the gun a final consistency/efficiency tune. At 160BAR there was still more to give from the HST, however this is the stated reg limit according to FX, so I stopped here. Keep in mind, when tuning, there is a peak where either more or less HST will reduce power. To maximize accuracy and efficiency you typically want to be roughly 5% below max power on the HST. And that is what I aimed for with this tune, because I also test my moderator designs for accuracy to ensure nothing is messing up pellet stability. So, yes, it isn’t truly “max power.”

2 Power Plenums, HST and reg tuned (160BAR)
FPS w/ 50.15 - 883
FPE w/ 50.15 - 86.85
Flow factor (calculated)- 6500
Power increase - 4.0%
Total power increase - 13.8%

And, for now, that is where I’ll leave it. If projectile velocity, rather than flow factor, were the goal, the obvious next move would be a 700mm barrel. If a higher flow factor is necessary, opening up the breathing path of the rifle, a higher pressure reg, a hammer weight, a stiffer hammer spring, and another plenum extension could all boost this rifle further, but probably not into a whole different league. For now then, I think this is where it’ll stay. It is a big jump over the .30 Crown and should allow for the development of moderators for everything short of what I’ll lump together as “big bores.” (based on advertised numbers, a Texan is something like 30,000 flow factor, which is just a different league)


The Dreamline; gently power massaged

Now to repeat most of the above tests but with the new higher power/flow configuration. As an aside, I can’t get over how smooth the dreamline's cocking action is. The throw is longer, sure, but it also feels like the leade on this barrel may be different as pellets go in effortlessly. Is this a characteristic of the new FX STX Superior liners? I digress.

FX Dream .30 power tune no-shroud (bare muzzle) - 3,668.4
This was so loud I had to bump the scale up even further. Don’t let the modesty of the trace fool you, it is just the scale, this was properly loud. Also that random secondary peak (sound reflection off something?) is once again making an appearance. At least it is consistent.

Dream Power Bare.png


FX Dream .30 power tune no-shroud (bare muzzle) Donny FX- 448.7
This isn’t really a reasonable/fair application for this little moderator, but I wanted to include it here as a point of comparison, a before and after, outside my own wacky designs. You see the diodes can do odd things, what with their whole “blow harder and they hold harder” mode of action, and that can make it hard to get some form of context. The conventional “hair curlers and washer baffles” style, based on my experiments so far anyway, seem to be much more predictable in that, when you blow harder, they get louder. As before it sets up an oscillation inside itself whereby the uncorking event is not even close to the peak. Again, I wouldn’t have called this moderator suitable for this application. On a positive note though, I think the Donny’s tiny exterior holes/vents acts in its favor. At this power level something like a Huggett or 0dB what with those big slots I think might see substantial amounts of sound exiting from them.

Dreamline DonnyFX.png


FX Dream .30 power tune no-shroud (bare muzzle) Falx High Flow - 135.3
Given how well the Falx Moderate Flow did before (on the unmodified Dreamline), I made a few little tweaks to create the first high flow variant. This is the result. I’m quite pleased with it, all things considered. As with everything, I’ll keep tweaking and tuning, I think I can cut that down a bit more, but it isn’t bad by any stretch. I am definitely feeling the squeeze here though for space, I really want more room for diodes and damping. That sustained post-peak-sound is not ideal, although perhaps is inevitable given the constraints. For what its worth, I also put a moderate flow Falx on here, to an average peak of 148.2. The moderate flow really isn’t suitable for these flow levels, but it was closer than I had expected in terms of peak.


FX Dream .30 power tune no-shroud (bare muzzle) Sarissa High Flow - 107.8
So to answer my own question, no I didn’t manage less than 100. :( I’ll keep tweaking and fettling and adjusting of course, but there was an unexpected and pleasant surprise in this: the post peak sound is quite low. Sure, I failed to keep the average peak under 100, but the post peak sound has exceeded my wildest expectations. In stark contrast to before the power-tune, you wouldn’t confuse the report with the Crown .22, but if pressed you wouldn’t think it a snarling almost 90FPE unshrouded rifle either. So, for now, I’ll declare victory and wrap up this already way-too-long blog post.

Sarissa H.png

I had a section here in the rough draft labeled “power tune, 3rd round.” I guess I didn’t need it. I’m trying to wrap this lengthy mess together with some unifying thoughts. I guess, thinking back a couple months when I decided to set this whole “high flow” thing in motion, I thought I’d need a bit more “context” to mentally place the performance of my moderator experiments at this higher flow factor. I still want some more context, perhaps another “The Big Test” series where I run a bunch of commercial designs, however I would never have dreamed I’d manage to get these high flow mods down close to moderate and standard flow performance figures and thus already have at least some point of reference. I especially didn’t expect to manage it so quickly. The Mus and Gladius both had difficult births, so for these to just kinda work was an unexpected surprise, but a welcome one.

As with everything I’ll keep tuning and tweaking and seeing where I can shave a few points off. But that, for now, is that. Thanks as always for reading and for all the encouragement. It may seem like a little thing, but I really appreciate it. It makes all this worthwhile. :) Until next time guys.

Barrel Borescope

Silent Thunder Ordnance

There isn’t really much context or background necessary here. This is a borescope of a couple interesting airgun barrels we have on hand. We’ll probably add more airgun and potentially firearm barrels over time.

This is a borescope of an FX Crown .22 showing the STX barrel and the function of the adjustable port. This liner is the "old type" pellet liner, that is to say not a slug liner and not the new FX superior liner. Initially this barrel suffered accuracy issues due to leading, and was treated with JB Bore compound, which resolved the issue. The barrel has been rarely cleaned, not for hundreds perhaps thousands of rounds, and has shot exclusively JSB pellets since its last several cleanings. Accuracy is excellent. One can assume this barrel has likely reached an equilibrium level of leading, where lead is shed at the same rate it accumulates. Also of note is how readily lead deposits flake off on the borescope.


This is a borescope of an FX Crown .30 showing the STX barrel. This liner is the "old type" pellet liner, that is to say not a slug liner and not the new FX superior liner. The barrel has been rarely, if ever, cleaned and has shot exclusively JSB pellets. One can assume this barrel has likely reached an equilibrium level of leading, where lead is shed at the same rate it accumulates. These STX barrels seem strange in how they accumulate and shed lead, although perhaps some of their odd appearance simply stems from how rarely they're cleaned as they seem not to need it the way conventional rifling does.


This is a borescope of a Diana Stormrider. The barrel has been rarely cleaned and has shot primarily Crossman Premiere pellets. Both tool marks and substantial lead buildup are evident. This barrel has never been treated (such as with JB bore compound) but likely would benefit from it. While there are a wide variety of factors limiting the potential accuracy of the Stormrider platform, the poor finish of this barrel is likely one of them. A rigorous cleaning followed by JB bore compound or better yet fire-lapping would likely improve this rifle's performance significantly.


This is the barrel of an Airforce Talon. It has shot a mixed diet of a wide variety of pellets, and has been fastidiously cleaned throughout its life. The powerplant of Airforce rifles tends to leave something to be desired, likely robbing this barrel of its true accuracy potential. As it stands though, this rifle would be considered accurate by most airgunner's standards.

Airgun Moderator Design, Performance, and Development - Moderator Velocity Loss (part 18)

Silent Thunder Ordnance

IMG_20200212_122336202E.jpg

Catch the previous episode HERE.

So this is a weird subject which seems to float around the forums and other social media and whatnot, the claim that airgun moderators reduce pellet velocity. It is particularly strange to me, given my firearm suppressor background, the expectation is typically a velocity increase not loss. In the firearms community the phenomenon is called “freebore boost.” It is usually fairly minimal, but readily measurable. So why would this phenomenon be reversed in airguns? And does it even exist at all?

While having heard about airgun moderators reducing velocity over and over again, I confess I’ve never actually seen a shred of data on the subject. I’d always written the topic off without directly testing it, because having now mounted many experimental super-light moderators to my rifles, I’d never seen any POI shift up or down to suggest a velocity delta. Clearly though heavier moderators can and do create downward POI shifts by flexing barrels ever so slightly. I’m also reluctant to totally discount “common knowledge,” because it tends to at least be rooted in something.

Curiosity therefore, finally, got the better of me and I decided to do a quick test. This is using a prochrono with lightbars producing good consistent readings. The rifle is my FX Crown .22. I want to preface this with a disclaimer though: this is not a test of all rifles, moderators, possibilities, or mechanisms. On the chopping block are a handful of moderators I had kicking around. The DonnyFX in .22 is meant to represent the “typical” architecture found in many moderators of two effectively “flat” baffles surrounded by sound damping material. While the Donny’s monocore design means it isn’t identical, I figured if it turned up anything interesting I could start building test models and revisit the subject. The Ramus Trident is a very unusual, perhaps unique, design what with its venturi and spiral “baffle” architecture. As I had them laying around I also thought I’d run a Falx, Mus, and Brevitas to try and cover the range of small-to-large with gas diode design. I took five shots with every moderator. Knowing that some guns need to “warm up” or have an errant first shot if left sitting for some time, which my Crown had done, I took 5 shots and recorded them. Incidentally a Pilum had been sitting on my muzzle, so remained there for the warmup. Pellets were unsorted, and went into the magazine dinged skirts and all. And one final thing to note. Regulators are imperfect, and will start to drift as the regulated pressure approaches the tank pressure. Not wanting this to affect the data, the reg on this gun being set for approximately 130PSI, I refilled the rifle at ~150BAR shooting before-and-after baselines with bare muzzle. There was no significant change, which is good.

Well first off, based on the data, I would speculate this Crown shoots low for the single first shot, possibly the first two although the second shot is within the range of “normal” especially accounting for a potential dinged skirt or what have you. But the real question of course is: what is the credibility of claims that moderators affect muzzle velocity? Well, on the face of it, all of the averages are within the standard deviation of the overall average, so any change would be quite small. From a shooter’s perspective, at least on this rifle, you’re very unlikely to notice it. It is possible that, with a large enough sample size, a statistically significant difference would be found. Technically speaking the lowest average was with a moderator (the DonnyFX) and highest with a bare muzzle, but that smacks more of anecdote than evidence. First off, it isn’t what you’d call improbable it’d have happened at random (just over a 1 in 5 chance unless I’m mistaken). Secondly, you’re still talking about a mere 5.2FPS gap.

Obviously this test isn’t comprehensive. Different rifles may perform entirely differently, and so too may different moderators. So I’m not trying to stamp “myth busted” on this just yet. What I aim to do however, based on the above data, is cast a somewhat more critical light on the claim that airgun moderators reduce velocity. If they do, clearly the effect isn’t universally significant. Presented with the claim that moderators reduce muzzle velocity, I would request a data set or a proposed mechanism of function. I also want to add that, if anyone reading this is sitting on said dataset or known mechanism, please get in touch. I’d love to update this blog with that new information, and generally further knowledge on the subject.

Anyway thanks everyone for reading. I hope this quick bite of info was informative and interesting. :)

Airgun Moderator Design, Performance, and Development - The Target (part 17)

Silent Thunder Ordnance

Catch the previous episode HERE.

What with everyone cooped up deaing with the Kung Flu, and more than a few wives nagging about the shooting sounds, I got to thinking about the other end of the range: the target. It is all well and good if you’re running a state-of-the-art moderator to muzzle that beast, but if the target impact is louder it isn’t doing you much good now is it?

For a test protocol, I went with the same setup as is used for moderators, 1.6 meters above the ground 1 meter from the pickup with the target perpendicular, outdoors with no nearby sound reflective surfaces. What had to change, obviously, is the shooting position. I ran my FX Crown .22 shooting JSB 18.13 grain pellets at 880fps, approximately 35 meters away from the target and partially occluding the pickup by a slight rise. The rifle with moderator that day averaged approximately 50, which is quite good. Suffice to say I have a high degree of confidence with these that the target impact is relatively clean here, near zero muzzle noise. Also please note these traces are not all on the same scale. The peaks of some are so high, and others so low, I adjusted them to better fit as I commonly do.

Steel Target Impact.png

First up is steel. Average peak was 690. It was not quiet. The target itself was a 5/16” thick by 9” circle of AR500 hung on a shepherd’s hook. You can clearly see the impact and subsequent ringing. But most people who are trying to be quiet aren’t shooting steel. So how about a more common target, paper?

Paper over duct seal.png

So what you’re seeing here is the impact of the pellet on a paper (8.5x11 printer paper with stick-on targets) with duct-seal backer in a wood box. The paper was retained only by slots into which it can freely slide in and out from the top, a typical convenient target design. Notice the large negative pressure spike, presumably caused by the momentum of the paper drawing it inward, toward the duct seal. Average peak was about 175. It was also surprisingly not quiet. It sounded much like a large piece of paper being shaken violently. Not surprising really, as that paper surface somewhat like a drum face, so can actually create an impressive amount of sound. Something which occurs to me, that may be completely idiotic or may be a not-horrible-idea, is that smaller pieces of paper would necessarily have less surface area. Might this reduce the sound signature of a paper impact? Just something to consider. In a way I was surprised by how loud this was, and in a way I wasn’t. Shooting paper indoors, it is unpleasantly loud if you’re close to it. The brevity of the sound impulse though makes it sound quieter than it actually is.

duct seal only.png

So I got curious, removed the paper, and shot just the duct seal. This one was a weird kind of mess. This is a rare case where I basically sampled until I got something I liked the look of. Why? Well, for whatever reason, the results were coming out all over the board. The “average” peak was 132, but I saw one spike as high as 336, and another where the peak wasn’t initial impact. WTF? My guess is two things were happening here. First is, without paper, the sound from the impact with the duct seal can more easily escape. That makes sense. The other though is that I may be impacting pellets in the duct seal, and that may be causing very brief high sound signatures. It is weird for sure. To the subjective ear though, these impacts were very quiet. If you were looking for a way to shoot without the wife or neighbors noticing, this might be the way to go. Definitely sounds a lot better than the paper. Interestingly though, still technically louder than most moderators. This gets into why sustained sounds are perceived as louder than impulses. (moderators produce a peak, but also more sustained noise than this)

pellet wiz.png

While I was at it though, I was wondering about the “sound floor,” that is to say just how quiet you could possibly make an airgun, hypothetically speaking. This is defined by the sound the projectile makes as it tears through the air not too far off from the speed of sound. The answer, as it turns out, is about 7.6. A chrono would have been a sound reflective surface that would have invalidated the test, however it would have been nice to know the pellet velocity. Approximating using a ballistic calculator, this pellet was likely traveling between 750 and 800FPS when it passed through the air, 1 meter away from the pickup.

I should add that I don’t have the world’s highest confidence in this, it is just a guess really. Air movement can be a major factor at this low sound level. Additionally, it is hard to know for sure what you’re measuring. Just because the timing kinda works and the results are consistent doesn’t mean they’re consistently what you think. Laying safely below the rise, listening to pellets zip over your head, you can clearly hear the difference between the muzzle puff and pellet zip, but what exactly is it you’re capturing? No way to know with certainty unless I were to engage in a LOT more testing. And as the breeze was picking up, I decided simply to pack it in.

So I hope all this was interesting, if not useful. It is an important lesson on the relative silence of targets though. It makes me think about ways to make quieter targets though. The thing about a target, unlike a rifle, is that it doesn’t need to be particularly compact, light weight, or aesthetically pleasing. Nobody huffs a target around hunting or posts beauty shots of their carefully tuned box. There are simply fewer constraints. This means a wide variety of sound containing and deadening devices could easily be applied. So too could devices to create destructive interference. If this is an area of inquiry which interests people, feel free to reach out. If enough people are looking for such a thing, I’ll happily chug away at methods to limit a target’s sound signature. Developing a “silent target” could be an interesting challenge in its own right, and, of course, the whole project would be posted here. The real question is: does anyone care?

Project - FX Crown Length of Pull Adjust

Silent Thunder Ordnance

IMG_20190311_151232981EDITEDmasked.jpg

We’re big fans of the FX Crown, no surprise there, so when a customer came to us looking for a length-of-pull adjustment for their FX Crown we took up the project. At its core, the issue is a simple one: how to make the stock on an FX Crown longer.

For those not aware, Minelli of Italy makes stocks for FX as well as most other leading airgun manufacturers. Their buttpads are injection moulded plastic, and offer a relatively elegant up-down left-right adjustment. Because the investment in an injection mould is substantial, they are probably shared across many different product lines they offer. The Daystate Redwolf for example also uses a Minelli stock, and the buttpad is a suspiciously similar looking part. So any solution for the Crown may well be applicable to a bunch of different rifles.

IMG_20200509_114357653.jpg

The first step, as with anything, is to figure out how the thing works in the first place. That means pulling it apart. This can be done with just a hex key and a phillips screwdriver.

As it turns out, the stock is attached with what appears to be two stainless steel wood screws of very similar dimension to your typical decking or sheetrock screw. That is very convenient, because it means sourcing new longer screws to fit with a spacer should be easy.


IMG_20200509_114802215E.jpg

Clearly visible are the two recesses in the stock which the buttpad assembly uses for alignment. Alright, that makes this relatively simple. Design and prototype a piece which matches the profile of the rear of the stock and buttpad assembly, and has matching alignment points, male and female, on both sides.

This design can then, relatively trivially, be adjusted for length to suit the user and manufactured to fit. Stainless steel screws can be sourced to match the desired length increase, and the whole thing can be made quite light. Conversely, for a change in rifle balance, this would be an easy non-destructive way to add mass to the rear of the rifle.


IMG_20200509_145621725.jpg

And there it is, shown at left in high-contrast white to make the new part obvious. (any color could be used) This particular example is a 30mm LOP increase.

Perhaps the more interesting aspect of this could be a means to simply and easily add things like rear monopods, bag riders, picatinny rail sections, et cetera. All interesting future directions, but beyond the scope of this project.

Crown LOP shim.JPG

7.16.20 update

The comments about a picatinny rail section grabbed people’s attention. So, bowing to pressure, we rolled out not one but three variants all 25mm. If you were looking for an easy and completely reversible way to put a rear monopod on your rifle with Minelli stock, this is it.

Crown Bottom Rail STANAG.JPG

Airgun Moderator Design, Performance, and Development - Failure Analysis and Flow Factor (part 16)

Silent Thunder Ordnance

Catch the previous episode HERE.

So far, of the moderators allowed out into the wild, two have come back with catastrophic failures. Lets break down these failures, why they occurred, and how they can be prevented.

levitas fail helium.JPG

The first was over a year ago, one of the first 1/2UNF revs. of the Levitas ever allowed out into the wild. The rifle it was put on was a power setup which used, not air, but helium to maximize output. Helium, for those unaware, has lower molecular mass and a higher speed of sound than air*, resulting in more efficient propulsion; it is a better gas for producing power. The moderator failed around the edges of the front cap, leaving the core itself intact. This rifle was not suitable for the small standard flow Levitas, however the failure at that point showed a weakness in the design. Cores are 3D printed. While the wall thickness was sufficient there in the original design, front and rear faces were trued up on the lathe to ensure concentricity of the moderator. That skim cut had thinned the edges of the front cap enough that it became a failure point. The solution was threefold. First, thicken the front cap. Second, rib the front cap to provide additional strength and rigidity without occupying as much volume. Third, suggest that this was not the right moderator for this power level. We’ll get to the specifics of point three further below.

*CORRECTION A reader wrote in with a correction, thank you! Previously this read as “viscosity and speed of sound,” the viscosity element of which is very likely incorrect or at bare minimum is not a significant factor. In summary, at essentially atmospheric temperatures and pressures, helium has a slightly higher viscosity than air or nitrogen. Under the operating conditions found in PCP this likely remains, although I’m unable to find a citation for it. More information about the use of helium as a propellant can be found here: https://en.wikipedia.org/wiki/Light-gas_gun More information on the far-from-straightforward physics on the viscosity of gasses at varying temperatures and pressures can be found here: https://physics.info/viscosity/

The second failure, pictured above, was more recent. It was a rev.2 Gladius running on a modified .308 Airforce Condor shooting slugs at 80FPE. What went wrong? According to the owner, after approximately 20 shots, the core failed and spit part of the second diode and the damping section downrange. (see images above) The failure was at the second diode in the struts above the body of the diode. While it is hard to see from the picture, there was no failure across a consistent layer. I also broke a couple of these struts to check for strength, and again, no materials issue is evident. This is good, it allows us to rule out a layer fault. The cross-section of these struts is conserved in this area, despite their organic shape, so they do not have a “weak point” per se which allowed different layers to fail on each of the six struts. For those who are familiar with FFF printing, I can hear the shouts already about the anisotropic properties of 3D prints. Let me stop you there though. The diode design places stresses on EVERY axis, there is no permissible weak orientation; a horizontal print orientation is not a solution. Furthermore the design is quite specifically engineered for adequate strength in this orientation. Finally, this material was specifically selected for cores because, among other reasons, it has excellent cross-layer strength and toughness. These material properties are determined in-house with a full suite of test equipment, instead of relying on manufacturer supplied data. This specific carbon fiber reinforced nylon was chosen very specifically for this application because of its exceptional material properties, which include a mere 20% increase in toughness by changing sample print orientations from vertical to horizontal; this is incredibly unusual among FFF materials and is not a typical property.

Everything in engineering is developed with what is called a “safety factor” or “FoS” which is represented by a number. There are slightly varying definitions of how it is determined, but the basic premise is that you have a number which represents the maximum load a part is expected to bear. Your safety factor is then multiplied by that maximum load, and you engineer the part to tolerate a load equal to this new value. Confused? So imagine you have a part which needs to hold 100 pounds. If you had a safety factor of 1, the part would be designed to hold 100 pounds and fail at 101 pounds. If you had a safety factor of 2 the part would be designed to hold 200 pounds, but still is only “rated” for 100 pounds. If you had a safety factor of 3 the part would be designed to hold 300 pounds, and again only “rated” (advertised for) handing 100 pounds. So on and so forth. It could be seen as essentially your margin for error. These safety factors can vary wildly between industry. Aerospace is notorious for having among the lowest safety factors, because these things need to get off the ground. Typical aerospace safety factors are 1.1 to 1.5. Structural members in buildings are typically 2. Pressure vessels are typically 3-4. It is rare to see a safety factor of 10 or greater. I design these moderators to all have AT MINIMUM a safety factor greater than 3.

So all that is well and good, why did this moderator fail? The answer is that, while the rifle was only producing ~80FPE much like the Crown, unlike the Crown it was using SUBSTANTIALLY more air to do so and had less volume (none) to defray that pressure. And that is the common thread here, with both these failures, it was a clear fault of mine: I failed to effectively convey what sort of power/flow the moderator was suitable for. And while design modifications could have prevented both failures, the internal core designs would not have provided good sound attenuation. And that makes this communication critical, not just to prevent failures, but to optimize sound attenuation. Previously I’d suggested people do a little “mental guestimation” based FPE output in relation to the size of the shroud, air efficiency, high drag barrels-projectile interactions (slugs), and shorter barrels for equivalent power. That broke down here. In fact, perhaps it never really functioned and we’d all just been getting lucky and/or banking on most people running airguns within a more modest envelope. So lets break this down in a little more empirical way.

Flow Factor

Empiricism in this case requires numbers, so how to quantify this air output or at least estimate it in a way which is reasonably accessible to everyone? Below is my attempt at this. The equation is somewhat simplified, but is derived from a larger formula based on the ideal gas law I use to calculate this myself. The units are a mess, but it allows us to relatively easily put a number to what sort of forces will be served to the moderator. The equation is as follows:

So this covers the air output, per shot, of the rifle with the units of BARcc/shot. Units must be maintained for this to work, pressures in BAR and tank volume in CC. Shots taken is, of course, the number of shots required to produce the pressure delta above. But there is one thing missing, and that is the shroud. This is where a compensation factor is required. If you have an efficient and reasonably large shroud (the FX Crown shroud is the standard here, having excellent flow into the shroud volume, before the moderator, and is 28mm OD), the equation spits out your final flow factor. But what if you don’t have a shroud, and are threading the moderator directly onto the barrel? Multiply your flow factor by 6. Why 6? Well it has to do with the relative volume of the FX Crown shroud and the gas-diode sections of my moderators. This may seem like a bit of a fudge, deriving this purely mathematically, but it is actually backed by testing on unshrouded rifles. (I can’t recall to what extent I’ve published that research, it is probably an anecdote somewhere in all this, although I reference the lessons learned CONSTANTLY by preaching the gospel of shrouds) I should note that the the application of the compensation factor is purely arbitrary, because I’ve standardized on the Crown. One could easily reverse this and have flow factor represent direct thread and a fractional compensation factor for shrouded guns. In this case though, it is my research, so my arbitrary decision goes. These numbers are only good for comparing with each other anyway, so it doesn’t really matter.

What if you have a shroud but it isn’t as good as a Crown’s? If you have a shroud which is a little small or a little inefficient (shorter length, smaller diameter, or air can enter the shroud but preferentially is directed into the moderator) multiply the flow factor by a number greater than one but less than three depending on your best guess for shroud efficiency. A good guess for most guns is usually 1.5-2. Keep in mind even very small shrouds can produce substantial improvements, so don’t discount them. Conversely, an even larger and more efficient shroud could potentially result in a compensation factor of less than one. And those improvements are seen in the final sound attenuation as well by the way; guns with worse shrouds or no shrouds will simply be a lot louder all else being equal. Yes you read that right, this to a limited extent is also a predictive model of airgun loudness.

So where does that napkin math lead us? Well that gives the FX Crown .22 running ~30FPE a flow factor of 460. It gives the FX Crown .30 running ~80FPE a flow factor of 1,111. A gentleman who provided data on his FX Impact .30 gave a number 725 for 74FPE. And how about a screwball, like the AAA Slayer .30 with a monster balanced vale and no plenum running 220FPE? 11,200. That is a big jump, as you might imagine.

But lets circle back to the point, how about these two failures, what were those rifles like?

Well for the first example, the modified Marauder, there are two big wrenches in the works: first is I don’t have the owner’s full specs list, and second helium behaves differently so it isn’t clear entirely how accurate this model could be. But for the sake of it, I pulled mrod numbers from a product listing and the pressure drop from the original correspondence and went for it. The result is a flow factor 14,822. You might be asking why that is higher than the Slayers? The simple answer is that not all gas released is converted to projectile energy. Far from it. This rifle consumed approximately 500PSI per shot from its cylinder according to the owner.

The second example the owner kindly provided me with detailed specifications permitting much more accurate results. It is an Airforce Condor fairly heavily modified with new barrel, tank, plenum, regulator, etc operating at 225BAR. (yes, that is plenum pressure) And, key here, no shroud at all. This all comes together to produce a flow factor of 15,300. For the astute among you, you’ll notice that means the rifle is consuming 3 times as much air per shot as the Crown for equivalent kinetic energy output and with an equivalent barrel length. Now to be clear, slugs (what the Condor is pushing) do have more barrel drag and lack the self-sealing skirt of pellets so will not be as efficient, but the efficiency gap here is still tremendous. Even I, an owner of an airforce rifle and bemoaner of their inefficient air usage, was startled when all those numbers fell out.

And that, as they say, is that. I hope it provided a valuable little peek behind the curtain on how some of this stuff works from an engineering perspective as well as how these things can fail. More importantly, I hope that going forward this provides a bit of a yardstick to help people select moderators, from any/every brand, which are better optimized for their rifles. And finally, I hope this provides some predictive value for people out there looking for a quiet rifle, because while this model certainly isn’t the last word in sound production/attenuation, does provide a good indication of what to expect.

Next up in the project will be a post about the sound profile of target impacts. Should be a little more casual than all this.

Airgun Moderator Design, Performance, and Development - The Falx (part 15)

Silent Thunder Ordnance

Catch the previous episode HERE.

So first off I want to thank all you crazy people for harassing me to get your hands on, not just a handful of these crazy experimental moderators, but enough of them that you’re actually creating production problems at Silent Thunder Ordnance. When I started I had no idea there was this sort of interest in moderator design and experimentation, it is a pretty fringe nerdy subject , so from all of us to all of you THANK YOU!

If you’ll forgive a little nostalgic reminiscence, I started this whole thing a year and a half ago when I got a brand shiny new FX Crown, which was a lot louder than I wanted, and I foolishly thought I could build a better mousetrap. People started emailing in asking to try one. At first I was just giving them away, the whole thing was just a crazy experiment after all, but that quickly became untenable as they were too expensive and time consuming to produce to just give away in such numbers. So we listed them, secretly, so people could throw a little cash in the hat if they wanted to participate in the experiment. And now this project has outgrown that. It is time to build out something scalable, upgradeable, and with some of the production bells and whistles. It’ll all still be cutting edge and experimental, but key is that it will be modular/upgradeable.

So what does this mean going forward? Well, a couple things. First it means all the carbon moderators are being shelved. All this time I’d been making them by hand, one at a time, which is a surprisingly labor intensive process. It simply wasn’t sustainable.

The second, more important, thing it means going forward though is a new moderator: the Falx. This design is intended to carry all my core principles of light weight, air stripping, flow delaying, and sound damping, which were developed in the carbon moderators, and carry them over to a semi-modular aluminum moderator in the Gladius footprint. This comes with a whole host of advantages. I’ve been working, for a year now and almost entirely unsuccessfully, on a modular moderator design. I sometimes get comments about how easy I make moderator development look. I understand how people get that impression from these blog posts, after all I usually blend a handful of interesting failures in with a few successes, but what you don’t see are often weeks or even months of experiments all of which end in failure and I have absolutely no idea why. Sometimes some thing just doesn’t work out and there is no clear reason. Even the Falx, which rides that line of too-large-tube-diameter, I’d been grinding away at totally unsuccessfully for months. And I don’t mean a little unsuccessfully, I mean producing peaks in the 150+ range on the .22 Crown level of this is hilariously not f*cking working, and having absolutely no idea why. Likewise I also don’t post my incremental tweaks and changes, where moving an aspect a mm or two in one direction or another creates a small gain. Point is there is a lot of grinding and a LOT of inexplicable failure which just doesn’t make for riveting reading. So too was it with truly modular airgun moderators, ones where sections could be taken separately and attached. In the end, it worked, but the results were bigger, heavier, more difficult to produce, and would have been more expensive. Why buy one moderator when you can buy four modular sections at four times the price? Yeah, didn’t make sense to me either. The Falx became my compromise, I call it modular but it is only really “semi-modular” in that the footprint remains the same but I am able to pull an entire core, or core section, out and replace it with another. The semantics of whether or not this counts I leave up to you, but you’ll see me refer to it both ways going forward. Sorry.

This modularity gives me a key advantage though when it comes to moderator development, and you all key benefits when it comes to their use. The out-going composite moderators used a monocore system, caps are held together by a core which is held in tension. This was an elegant solution, but limited space and design elements. Critically, it meant every time I wanted to test something, I had to build the entire moderator. With threaded end caps in an aluminum tube, the core no longer needs to be held in tension. This frees me to make multi-part cores which are modular, serviceable, replaceable, and upgradeable. I can now simply swap internal components in testing, allowing quicker and easier assessment of different design elements. Also things like true floating dampers, multi-axis chambers, and an even wider variety of materials are, not just possible, but utilized to make the Falx even quieter than its all-composite brethren. This is, simply put, the quietest moderator design I’ve ever built, and I’m not stopping here. As new revs. come out, users who want to upgrade will be able to send their units back and get the core swapped to the latest rev.

There is always a catch though, and this is true here as well. There is no getting around it, aluminum is heavier than composites. That said, I’ve done what I can to minimize it. Instead of increasing wall thickness and cost to allow machined designs on the outside of the tube, I opted for a thin smooth wall to maximize cross-sectional strength. For those looking for extra stylish flair, custom engraving is certainly a possibility. The result is a design which, while heavier than its all-composite counterparts at ~180 grams (varies by core), can still meet or beat the trend for mass-to-volume-ratio of other aluminum moderators on the market and absolutely monster it for mass-to-sound ratio.

So now, having gotten that sleazy sales pitch, how did I get here, and how does the Falx actually perform?

The lack of scalability of the carbon monocore designs was actually pretty clear pretty early on. So I started working on something I nickamed the Cerberus, named after the multi-headed-dog because it was meant to, not just solve the manufacturing problems, but sectioned and modular. Each module could be attached to another via what was initially taper mount via threads and what evolved into a taper-and-lug system to ensure concentricity was maintained. And this would mean, instead of being stuck with whatever performance/size envelopes I built something for, people could grab pieces to actually tune their moderators to their rifles. And this is a key thing I want to hover over, the idea that a moderator to perform optimally should be relatively tuned to the rifle. This isn’t so much the case with a typical “hair curlers and washer baffles” design as you’re essentially asking a question of size/weight vs. sound attenuation as sections are all identical, these gas diode moderators have measurably better performance on a rifle for which they’re optimized. So that is great, where the heck is it? Well as it turns out, in solving the old manufacturing problems I created a whole suite of new ones. After all who wants to buy one moderator when you can buy one in 5 parts for five times the price? I beavered away on this for ages before giving up. I think I’ve said this before, but for every test you see here there are dozens of failures that either aren’t interesting or I haven’t the foggiest idea why they didn’t work. And nobody wants to read that any more than I want to take the time to write it all up. Never the less, I think some of these designs are cool so for your perusal I post just a handful of them here.

2020-06-06%2011_49_36-Window.png

This one is probably fairly obvious, it is the rifle mount end section. Notice that honeycomb though? That came about as I was trying to maximize strength and sound attenuation while playing with the 200FPE AAA Slayer. It worked great too, and this filtered down into the Brevitas design. Another clever little track was the primary air stripper/blast baffle. Rigidity increases exponentially with material thickness, the majority of the load is borne by the surfaces, and the neutral plane in theory does zero. This principle is used all the time, from I-beams to composites. I did it here with the blast baffle increasing strength substantially to tolerate the the Slayer’s violence while reducing weight and increasing internal volume/sound attenuation. Kind of a fringe application, but a nifty little trick none the less.

2020-06-06%2011_51_19-Window.png

What is interesting here isn’t the gas diodes, but the wall section. I’m always looking for ways to make one thing do multiple jobs. What goes on inside a moderator is complex, sound and flow are mingled and act together, and if I’ve learned one thing it is that any attempt to JUST damp sound or delay flow will be met with failure, you must attach the problem holistically. So here I created a wall reinforcement that didn’t just increase tube strength, but had high acoustic impedance. In layman’s terms, it significantly reduces the sound wave returned by the moderator walls, while like the honeycomb increasing strength and internal volume. Three jobs in one.

2020-06-06%2011_50_25-Window.png

This was a goofy little experiment, but it worked. You see diodes need to saturate to function. Think of it like a referee’s whistle. If you blow into it softly, the vortex of air won’t form and you won’t get any whistle. Once you reach a certain threshold though it works, and you can keep blowing harder and harder until veins are popping out of your neck and people nearby start moving away from you because you have the acoustic version of serious garlic breath. I digress. Point is diodes are similar in that they require a certain amount of air flow to “saturate” and begin to really function. Below that threshold they work pretty much like conical baffles. So what happens when your tube is too big and you can’t shrink it because it’d look goofy in a modular stack? Well build a tube inside a tube. I jokingly referred to this as mini-mouse, because it is the same concept as the Mus but scaled down to fit this proposed modular platform.

2020-06-06%2011_50_04-Window.png

What is this mess? Well….. so diodes take up space in increments. Exceptions like the one above aside, that space is essentially determined by tube diameter. But what if they didn’t have to? Instead of building discrete diodes, create a single diode as a continuous spiral which folds over on itself again and again and again. Then you could pack precisely as much or as little diode section in as you wanted, and potentially pack them more tightly as well. That was the idea anyway, and this is what it looked like. It was a hell of a thing to design. I built it in this length because I wanted an apples-to-apples comparison against another matching “regular” diode section. Unfortunately it didn’t match it for performance, and I don’t know why. But that is okay, there are only about a million different parameters to tweak to figure out why. I may revisit this at some point.

Is there any relevance to this whatsoever? Well aside from a few elements of this ending up in the Brevitas, some lessons learned here made their way, or will make their way, into the Falx. It is all a big messy endless learning process. The biggest and most significant part here is that I wanted to keep this modularity moving forward and that in turn informed how I designed the Falx’s tube to maximize what I could do with it in future. So lets look at the Falx.

98.9 - Falx Moderate Flow rev.1 as tested on .30 cal 80FPE FX Crown.

So I’ve been playing around with what I’ve been calling Flow Factor, and I’ll explain that in more detail in a future blog post. The short version though is I created a simplified way to estimate what exactly you’re subjecting the moderator to. And, as it turns out, for this diode architecture, the .30 Crown sits on the edge between 2 and 3 diodes. This is where a working version of the spiral diode pictured above would probably have been ideal. But since I haven’t gotten that working yet, I opted for 3 diodes and beefed them up a bit as well. The sound profile also tapers reasonably quickly for the power level, and I chalk that up to the more efficient damping section. It makes this design sound quieter than it meters. I’ll talk a little more about this below.


49.6 - Falx Standard Flow rev.1 as tested on a .22 cal 32FPE FX Crown

I’m really quite chuffed to bits about this one. I never thought I was going to pull off a design which could beat the standard flow Pilum in the same 170mm external length, but here we are. There is actually less available length inside the Falx because of caps and threads and such. How did I manage it? The diodes got a few subtle tweaks, but the big one is the damping section, seen as the iso grid. Those fully floating dampers mentioned above? Yeah, they work. And I’ve got a whole bunch of ideas which I can’t wait to test that could potentially improve it further. The other big thing here is a better way to constrain the inner foam in the damping section. Previously that was integral to the monocore, as a series of load bearing (tension) legs and struts. Now though the center isn’t load bearing, which freed me up to use a larger number of very thin rods. This creates less impediment to the air and sound, so it can more readily enter the damping area. Thus it is quieter. The force is now borne by the iso grid at the perimeter.

And I want to bang on modularlity one last time here, because without it I’d have never figured this out. You see each little change to the damping section produces very small changes, and a lot of those changes are to the post-peak-section. Previously I’d have to build a whole new core for every configuration, and those small changes would have been lost in the noise of core-to-core variation. Here though I could keep the same tube, same diodes, same cap, same everything and change JUST the damping section. Little by little I built up ideas which worked, but just by a little. I could then exaggerate them and combine until enough little ideas that it could make a real impact. I’m thrilled. And this was forward compatible too, working well in the moderate flow Falx.

I like to end these blog posts with a look forward, what am I thinking about next and where am I going? And there are a couple things. I want to do a post about flow factor, how moderator tuning matters. I also want to continue tweaking the internals, obviously. Having a modular design, why stop just when you’re satisfied? So I’ll continue to beaver away at that, probably with increasingly bizarre ideas. And finally I want to play with the envelope a little more, or push the envelope if you’ll forgive the lame pun. But that is all for now. I hope you all enjoyed the read. :)

Night Vision Power Adapter

Silent Thunder Ordnance

Do you ever wonder if, some day, we’ll look back on COVID-19 and think of it as the golden era of weird pet project completion? Well this is one of those, something which otherwise might not merit the time, but now with time to spare evenings and weekends, it just started making sense.

The crux of hunting with night vision is always power supply. You can hunt for hours, but the batteries in your night vision typically can’t. Sure you can bring more batteries, and fumble around in the dark swapping them, but wouldn’t it be convenient if you could just run your night vision off a wall wart and not even think about it? Well that was my idea.

1553633342_7366668795c9a903ea694c2.84354515_IMG_20190325_153235247.jpg

For reference, I’m using THIS UNIT. At STO this style of night vision is so popular, we actually have several kicking around of various generations. We actually prefer these to much more expensive night sights because of their simplicity, reliability, and the fact that they work great with your existing scope. They run on a pair of 18650s, which if you run the illuminator can be drained in a couple hours.

First step is to acquire the requisite wall wart. An 18650 outputs between 3.0 and 4.2 volts depending on charge. Some devices have low voltage cutoffs so you don’t damage cells by over-discharging them, so being somewhere above the minimum is probably good. 4v per cell across two cells means an 8v power supply should be just dandy. So THIS ONE seems like a cheap option. Other devices though may take other numbers of cells, or other chemistry cells for that matter, so SOMETHING LIKE THIS will give you a bit of versatility if you’re reading this blog post and liked the concept but wanted to power a different device.

Next step is to make an adapter. Because I want this to be 100% reversible, I figured just a battery analogue with power on one end would be an easy win. So I designed the “platonic” power adapter, with space for wires to run along the spine, an easy grip for removal, and a crowned face for good contact. This can be zipped out on an FDM printer quite quickly and easily.

IMG_20200327_110739740.jpg

Copper contacts are the next step. This can be done in a variety of different ways, but the easiest is with a little copper tape. The trick is that the adhesive can be cooked off if you aren’t fast and deft with the iron, so use a generous bead of flux, and solder quickly. Wash off the flux, then just peel the backer off the adhesive and stick. A file or a little sandpaper can be used to clean up the edges. Pro tip here, wipe the faces with your favorite contact cleaner/protector so that those pink and juicy fresh copper and lead faces don’t oxidize and start producing lousy connections.

IMG_20200327_111617822.jpg
IMG_20200327_112138379.jpg

Another pro tip, it doesn’t look pretty, but a little silastic on the wires will act as strain relief so the solder joints don’t just break off. It isn’t pretty, it never is, but we’re looking for function not beauty here. All this will be hidden in the battery box anyway. And one final pro tip before you throw this thing in your equipment and run it: hook it up to your multimeter and ensure the polarity and voltage are correct. Consider even going one step further and clearly marking them! Never assume the last monkey on the wrench knew what they were doing or gave a flying f*ck.

IMG_20200330_151905222.jpg

Success! You weren’t expecting a beauty shot were you? ;) It powers up, it works great, and that is good enough. This same principle can be applied to a huge number of different devices to provide wall power for whatever battery-operated device you want.

And I know what you’re thinking: what about an SoR? The answer is yes, however you’ll need a MUCH beefier power supply and to wet the copper contacts with more solder to fortify them against the amperage they’re about to have to carry or use heavier gauge copper plates. We actually have a bespoke SoR power adapter, one which runs off one of our big PSUs. If memory serves, it was built for our endurance testing of the light. But I digress.